“ ProShop Multi Vendor - Multipurpose Woocommerce Android App”
Created: 03/07/2020
Updated: 03/07/2020
By: iQonicDesign
Email: [email protected]
We are following CodeCanyon rules and regulation, so under this licenses you can only publish single product on play store. And you can't sell this source code anywhere. Please follow Standard Licenses: https://codecanyon.net/licenses/standard/

Basic Installation
To develop app you need to set up an Android studio.
Android Studio Setup Process
- Download Android Studio - https://developer.android.com/studio/
- Install Android Studio - https://developer.android.com/studio/install
- Learn more about Android Studio - https://developer.android.com/studio/intro/
Pre-Setup Account
To start your android project, you have required below account for your android app.
- google-services.json File. For more information Click here
- Razorpay Key - Click here to Obtaining your Razorpay API keys
- Stripe Payment Key - Click here to Obtaining your stripe API keys
- Worpress setup - Click here to see worpress setup steps
Wordpress setup
Follow this documentation for setup wordpress on your system
Android App Configuration
Open project in Android studio
Step 1:- Select ‘Import Project’ option and find your “proshop_droid" Project
Step 2:- Select your current project then click ok button and wait few minute

Change ApplicationID
- Find build.gradle file inside app folder and click to open and change your applicationId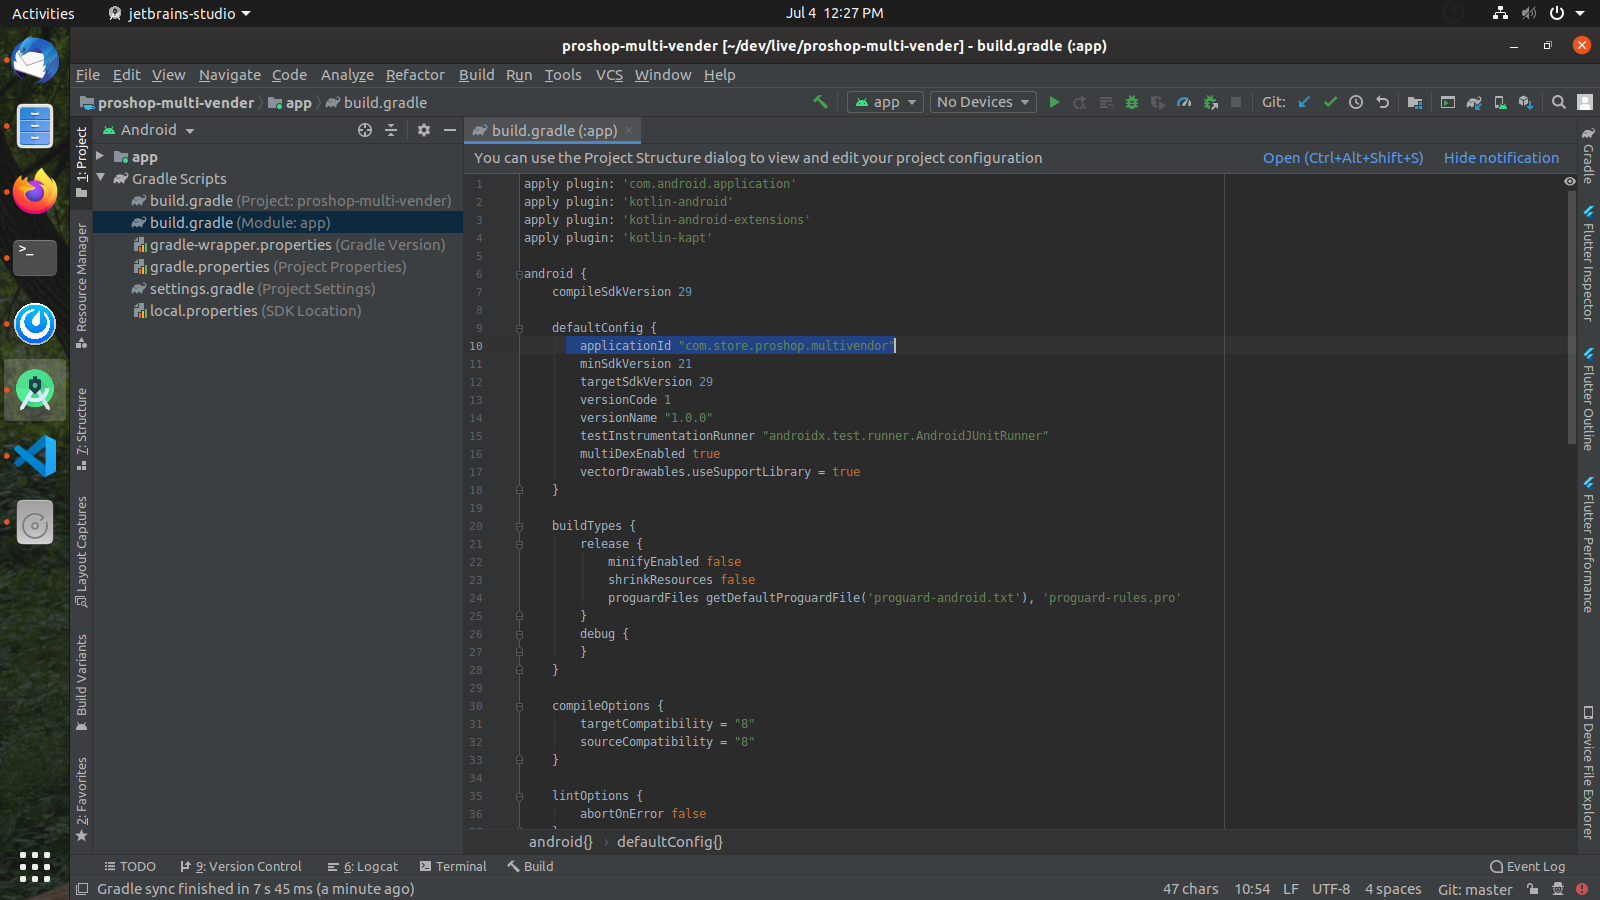
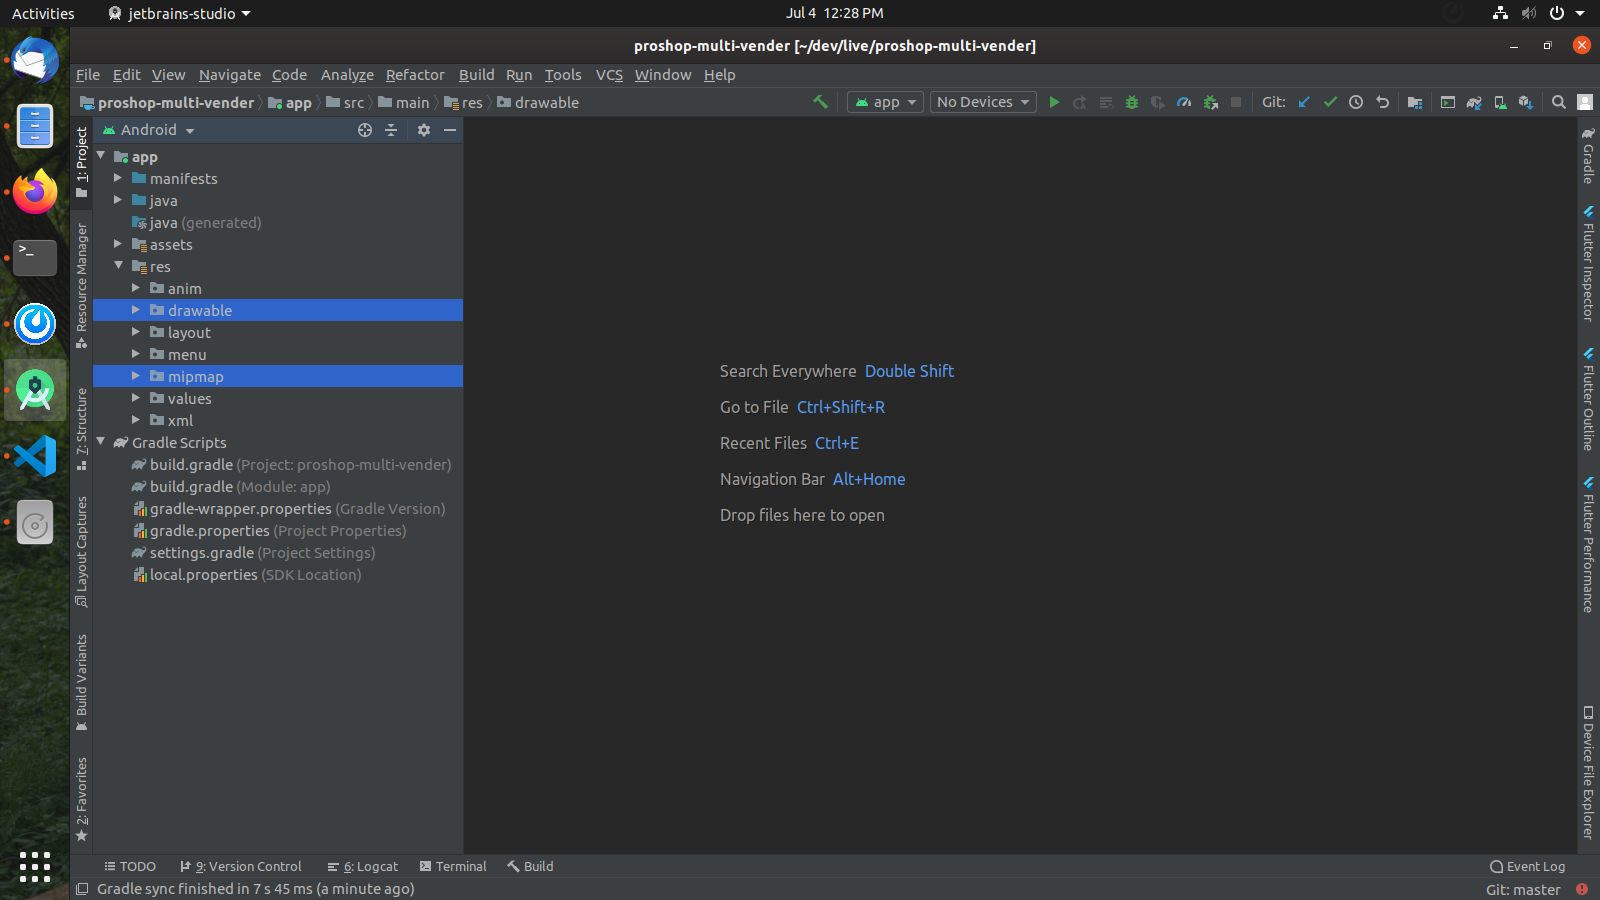
Change Application menu icon, background and app icon
- Open res folder inside open all drawable folder and all mipmap folder and replace your background images and icons here.
Change Application name
- Open app gradle file and change your 'app_name' here
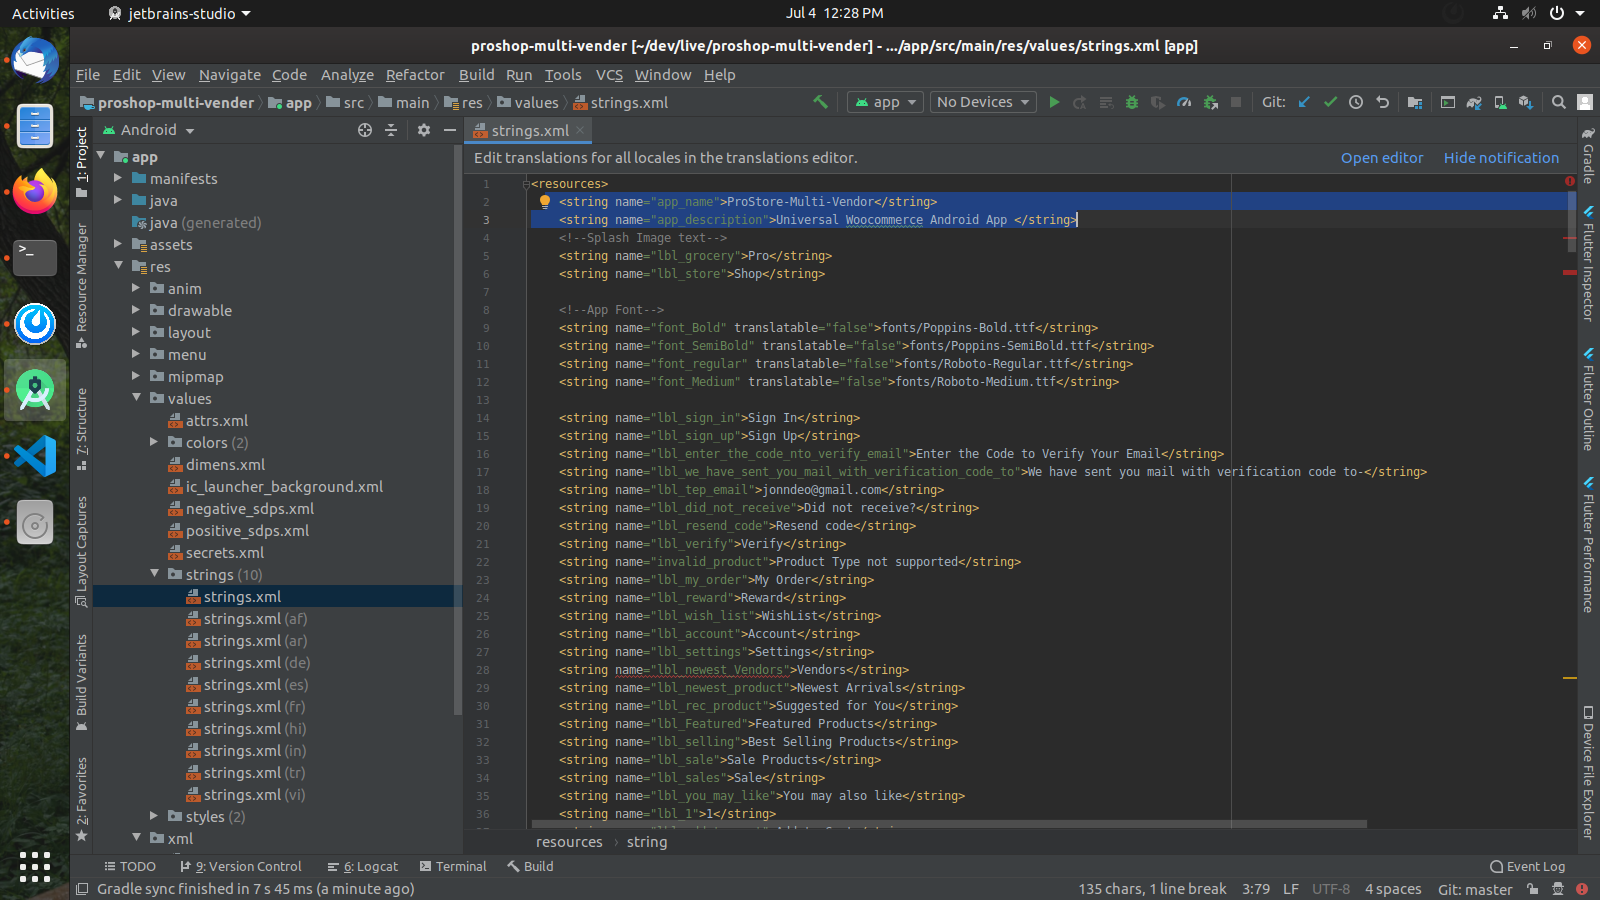
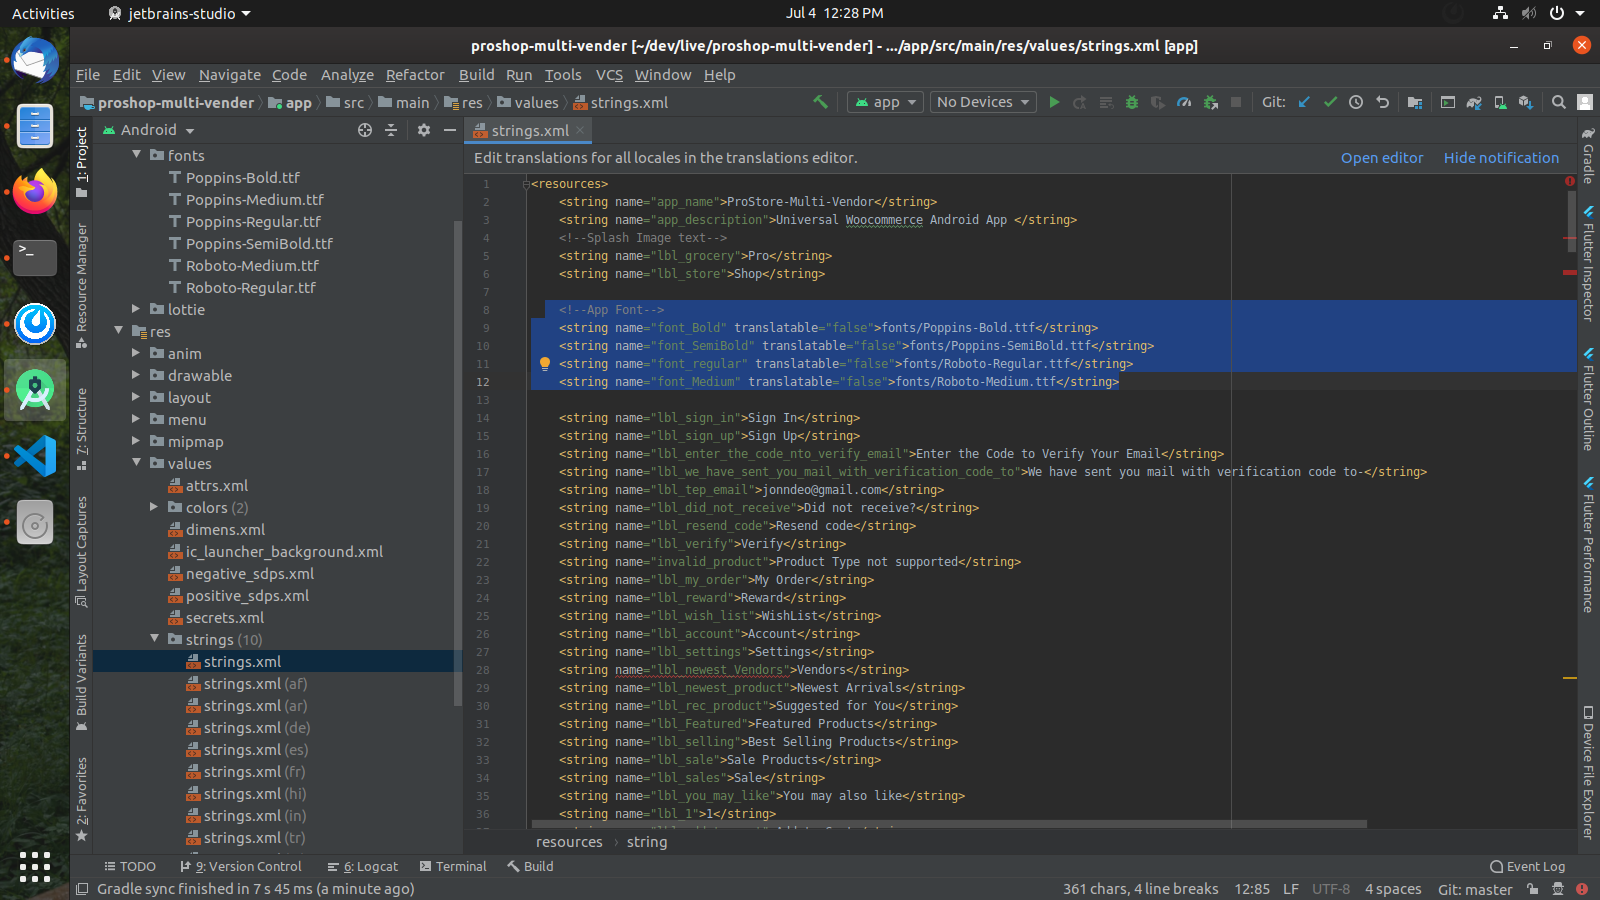
Change app Font
- Click and open font folder and change ttf file
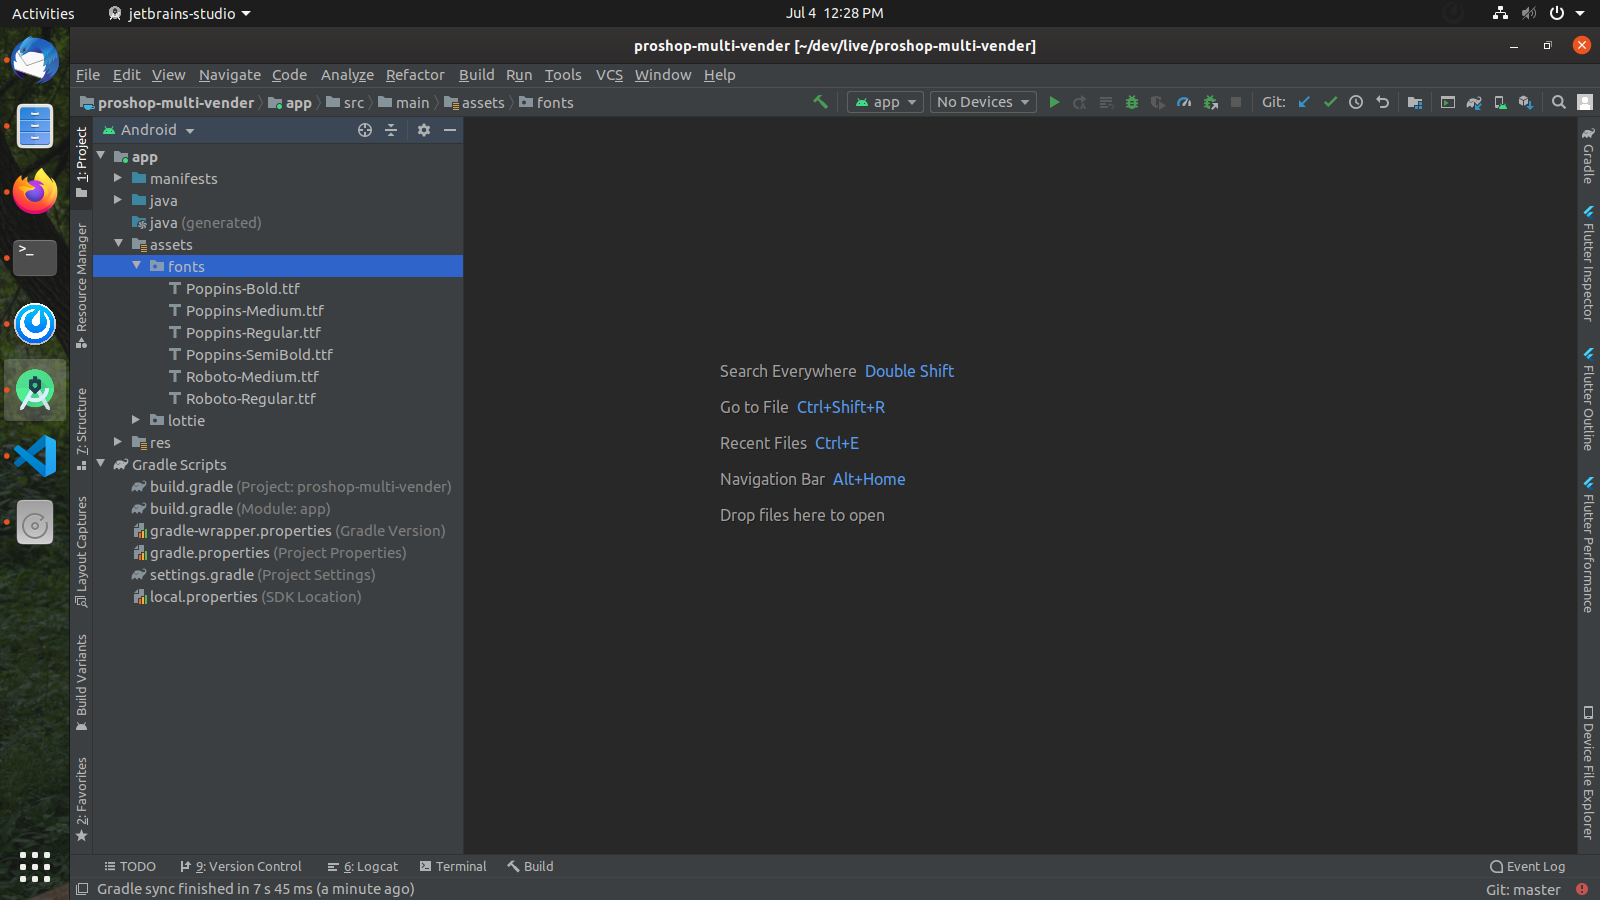
- Open String.xml file and change font string value
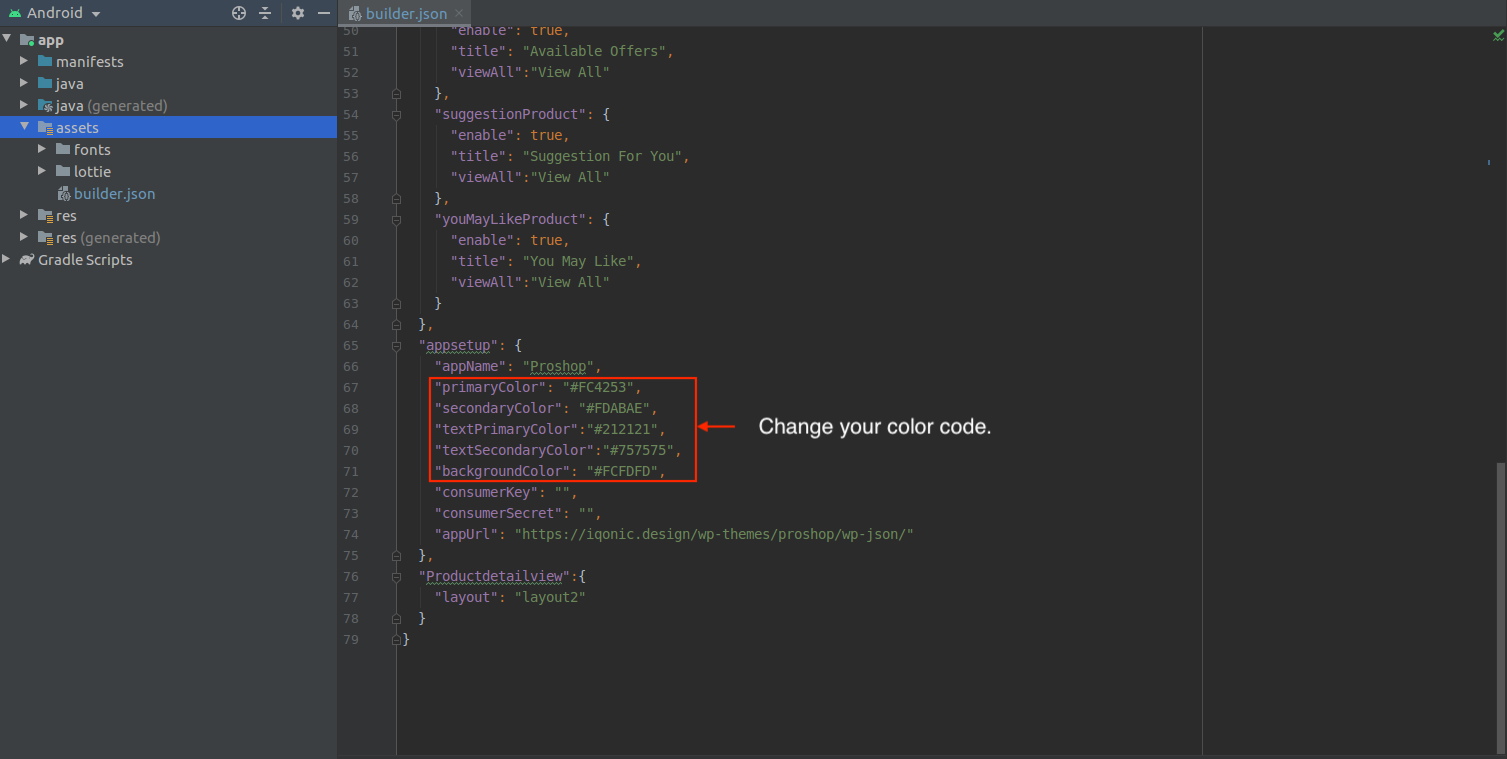
Manually Change App Colors
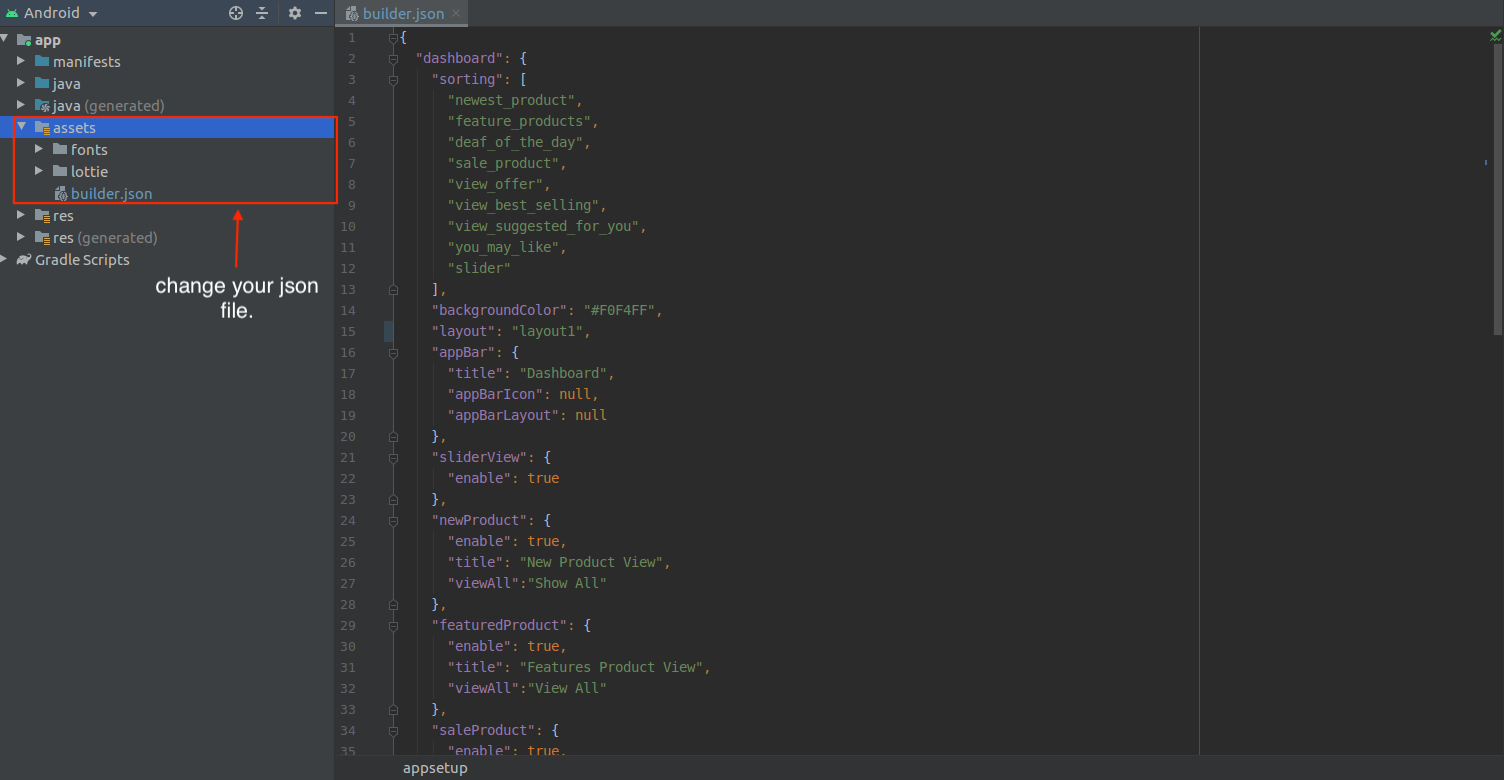
- Go to the assets folder and open builder.json file and change color code.
Manually Change Server URL
- Go to the assets folder and open the builder.json file and change your Base URL
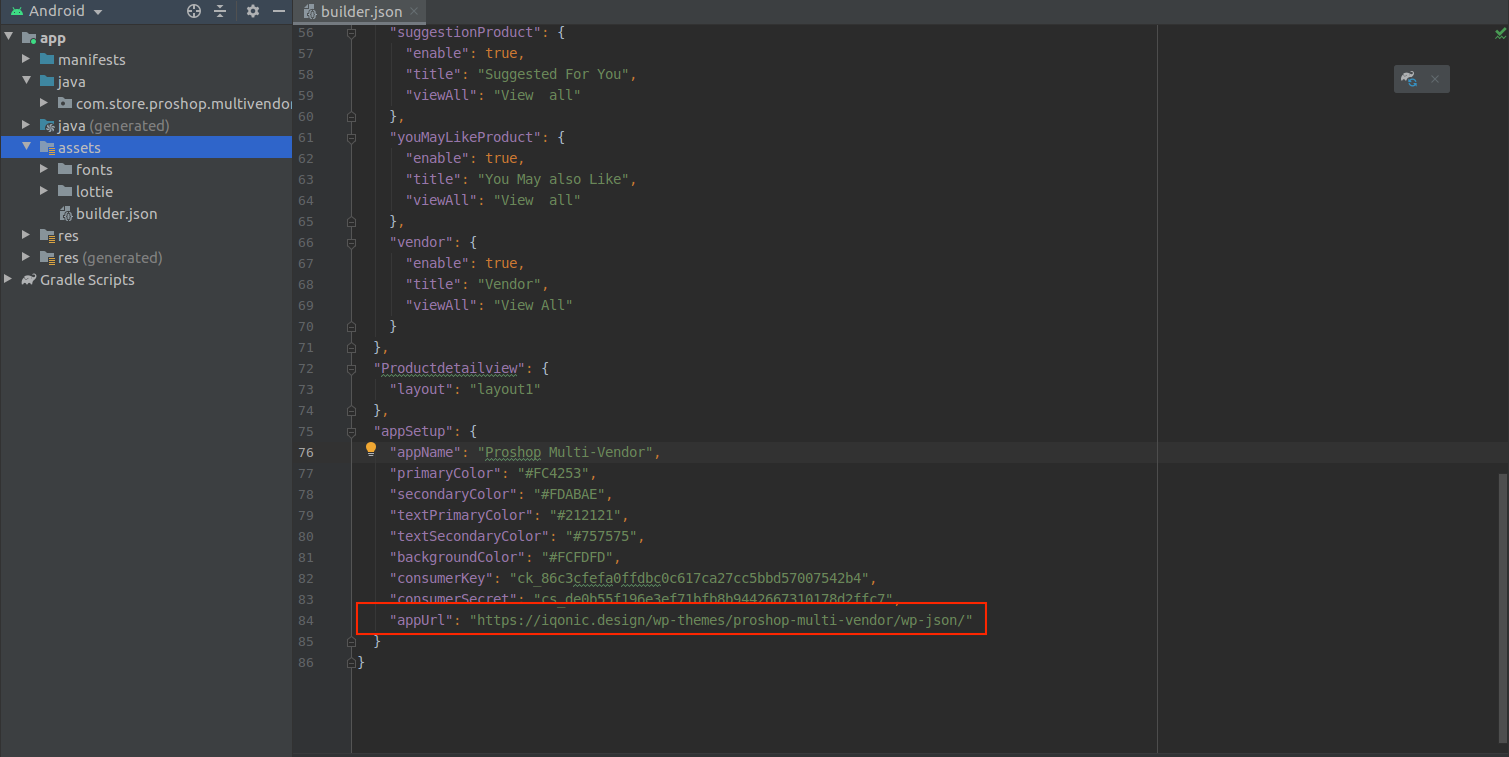
Manually Change App Key
- Go to the assets folder and open the builder.json file and change your consumerKey & consumerSecret.

How to generate json file from builder
Goto http://iqonic.design/AppBuilder/#/ and configure your changes which you want and download json file.

How to import JSON file to app?
In the main directory go to the assets folder and change the builder.json file which is downloaded from the http://iqonic.design/AppBuilder/#/
The file name must be builder.json.
Create a Firebase Project
The first step is to create a project in the Google environment.
Note: You need to have been logged in with a Google account which can use the Firebase console in order to walk through this tutorial.
You create a project with the Firebase console.
Follow the steps below to create new project.
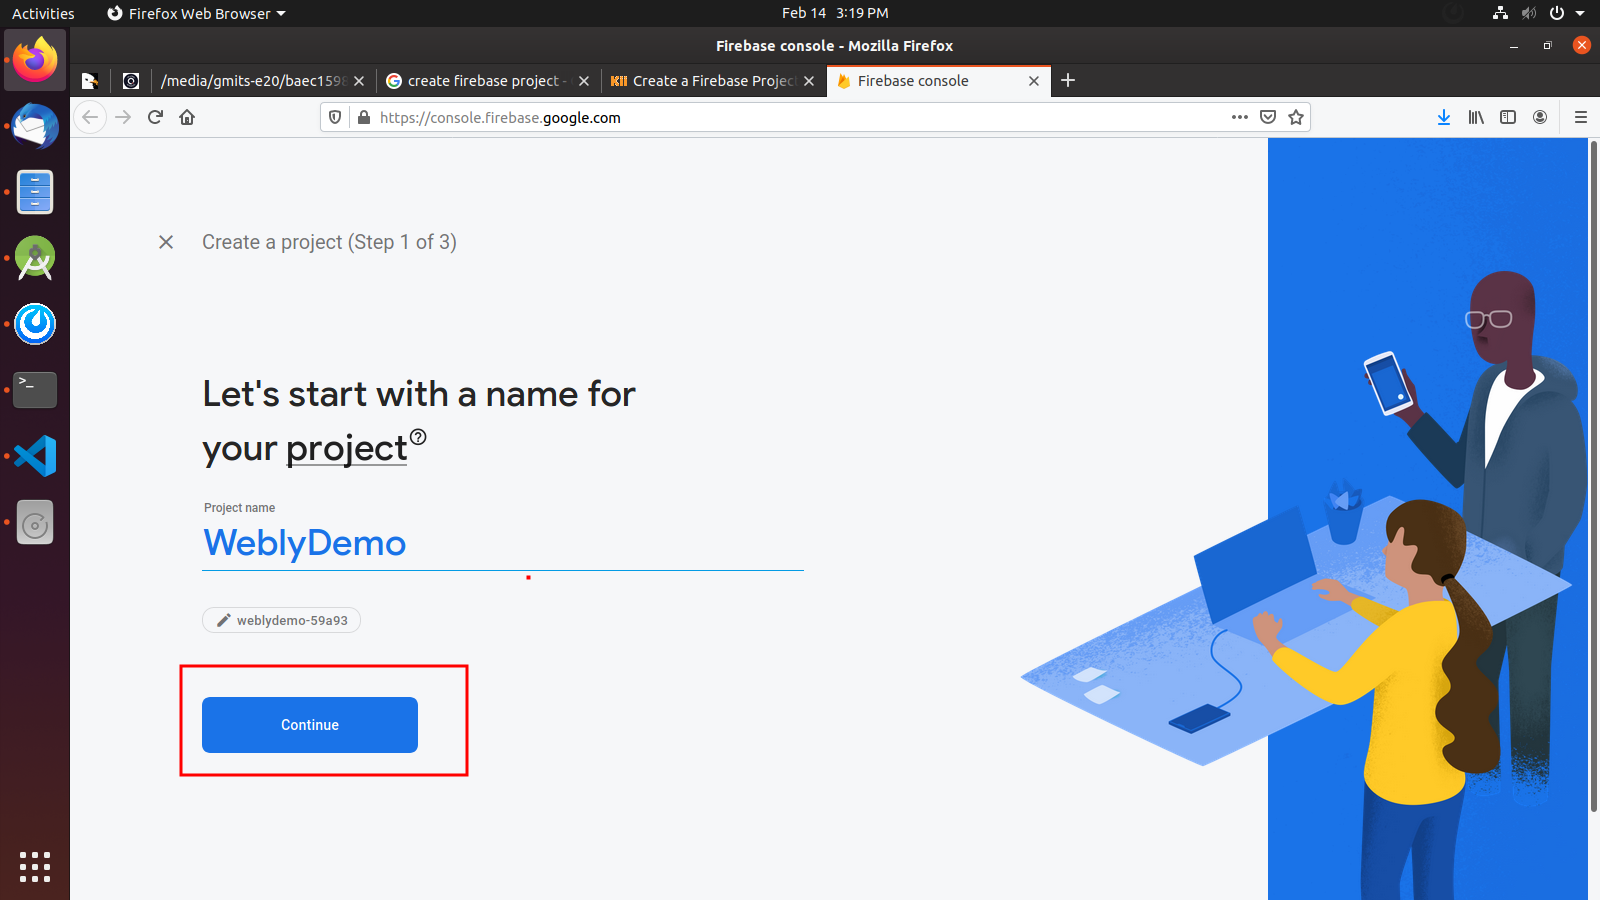
- Open the Firebase console.
- Click "Add Project" and follow the steps upto creation of project.
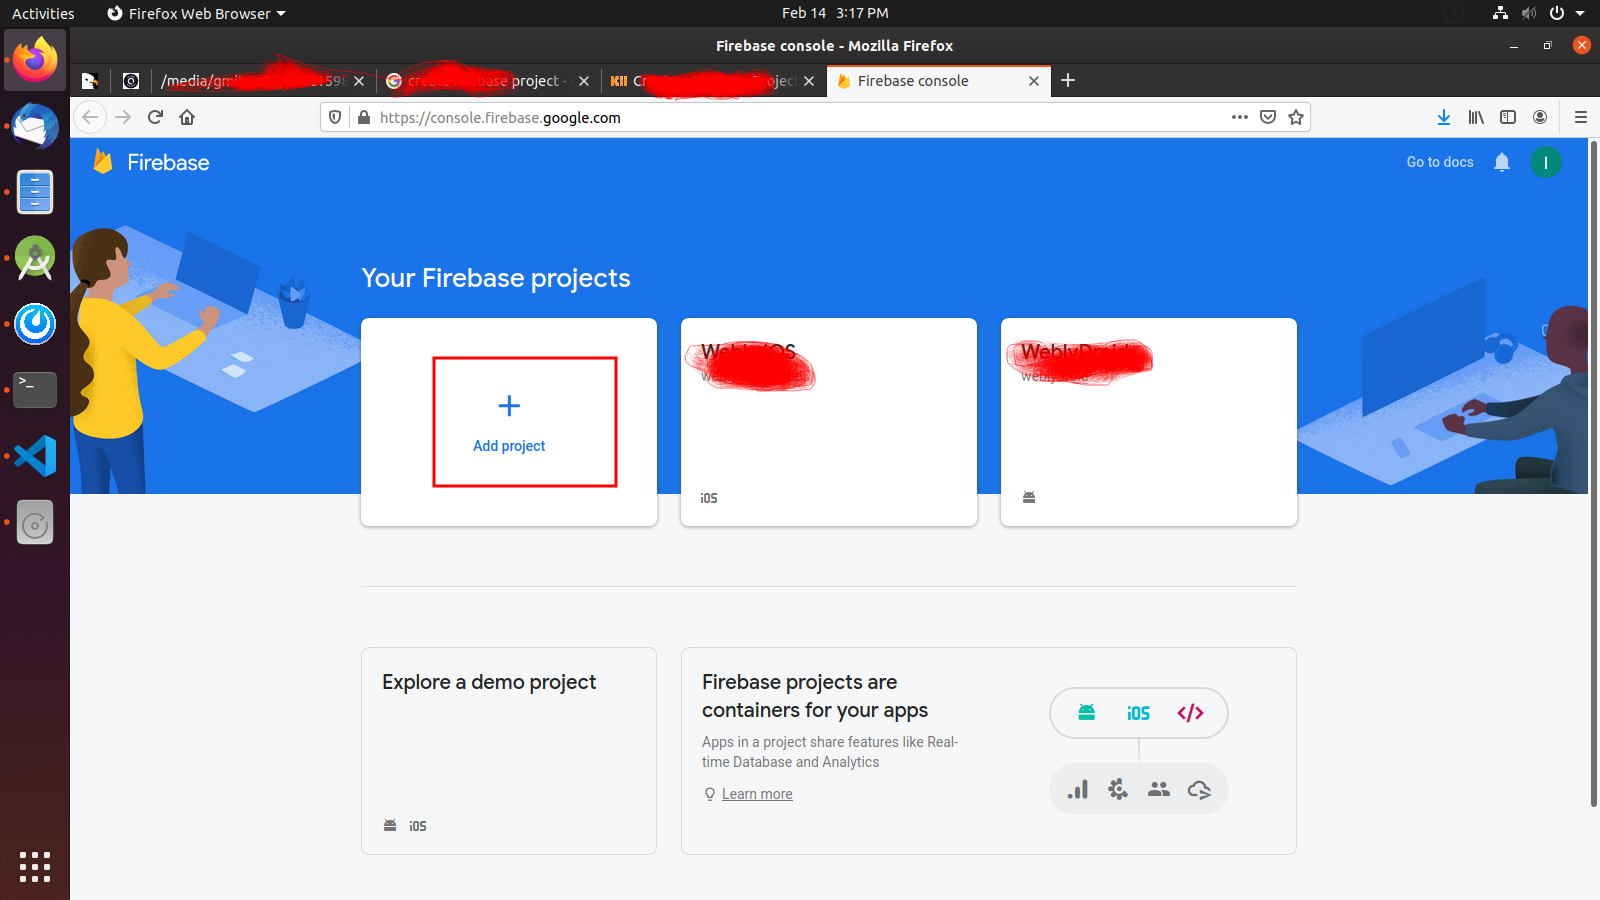
- After creation of project your screen looks like below.

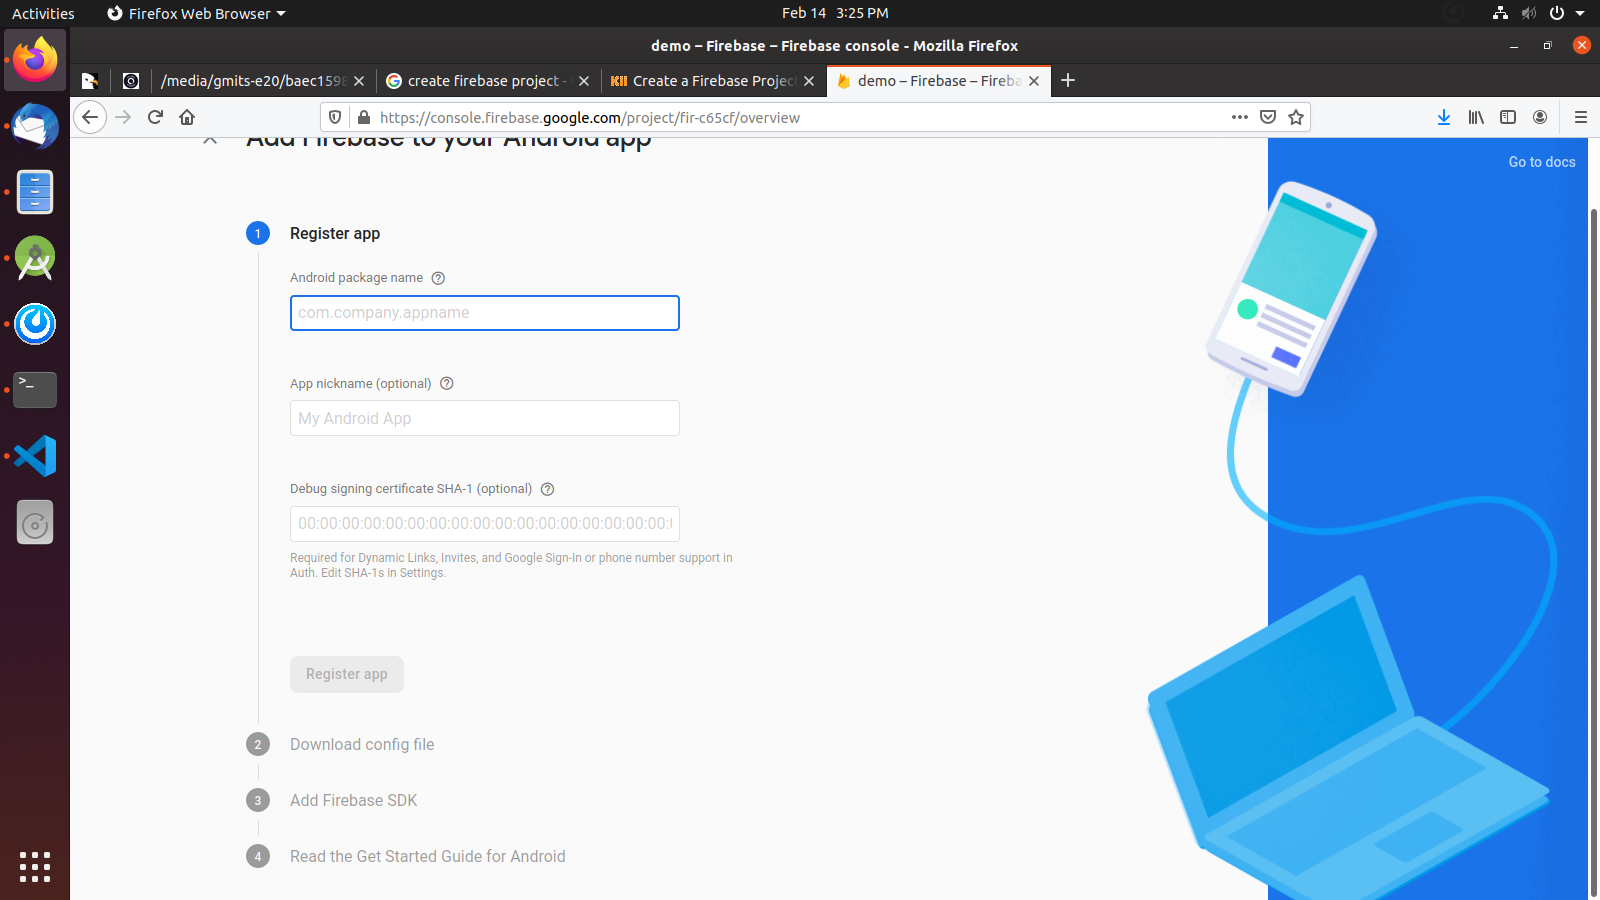
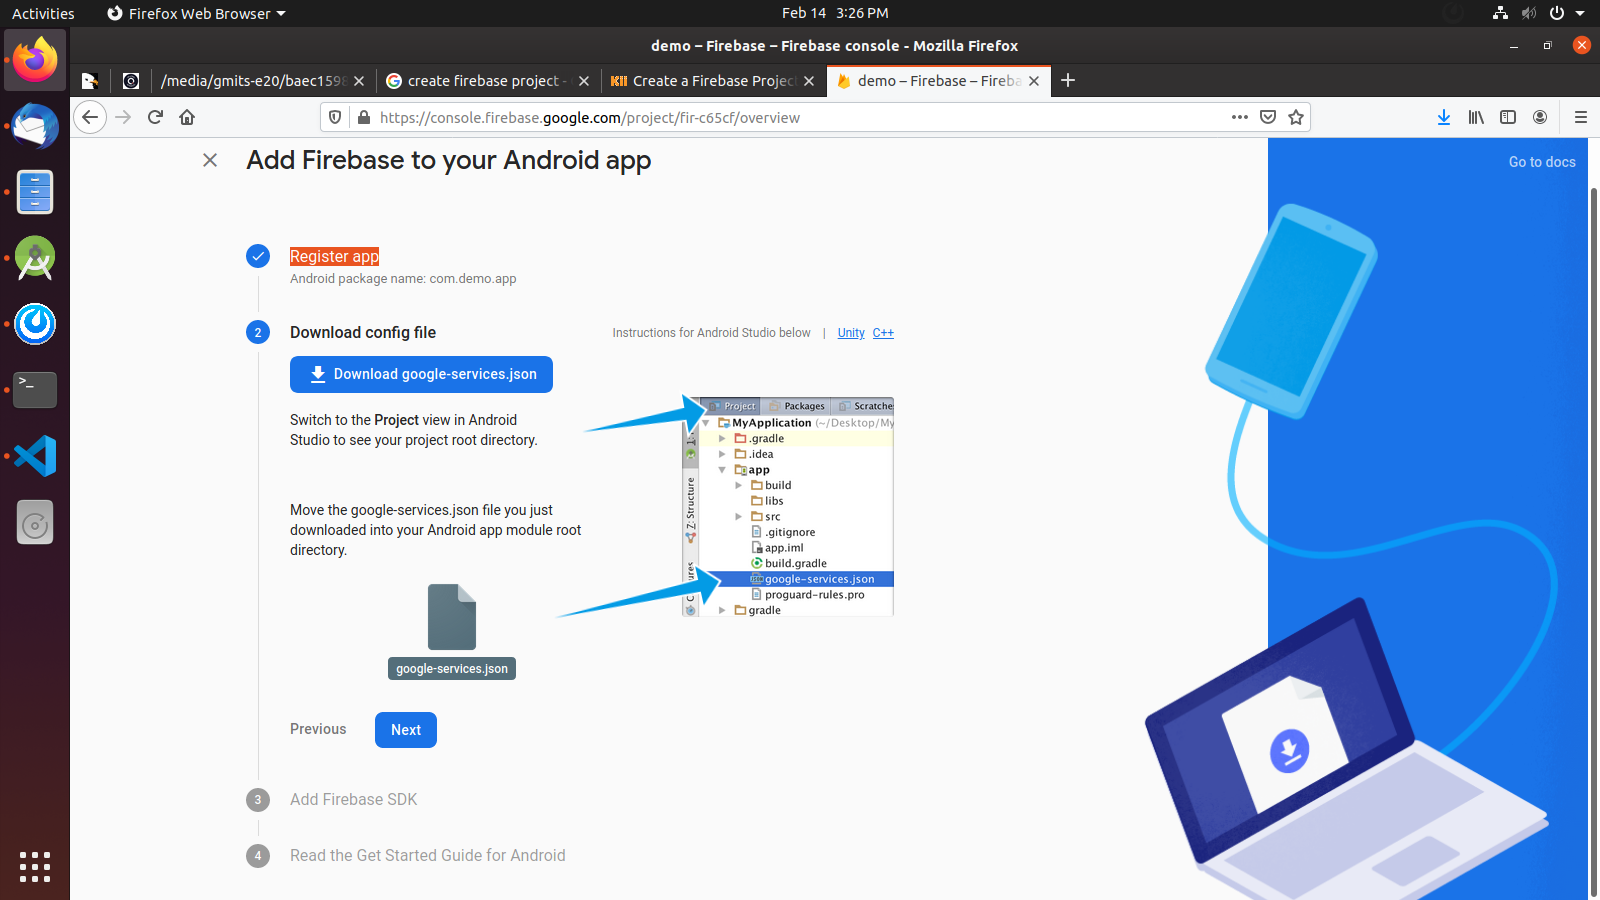
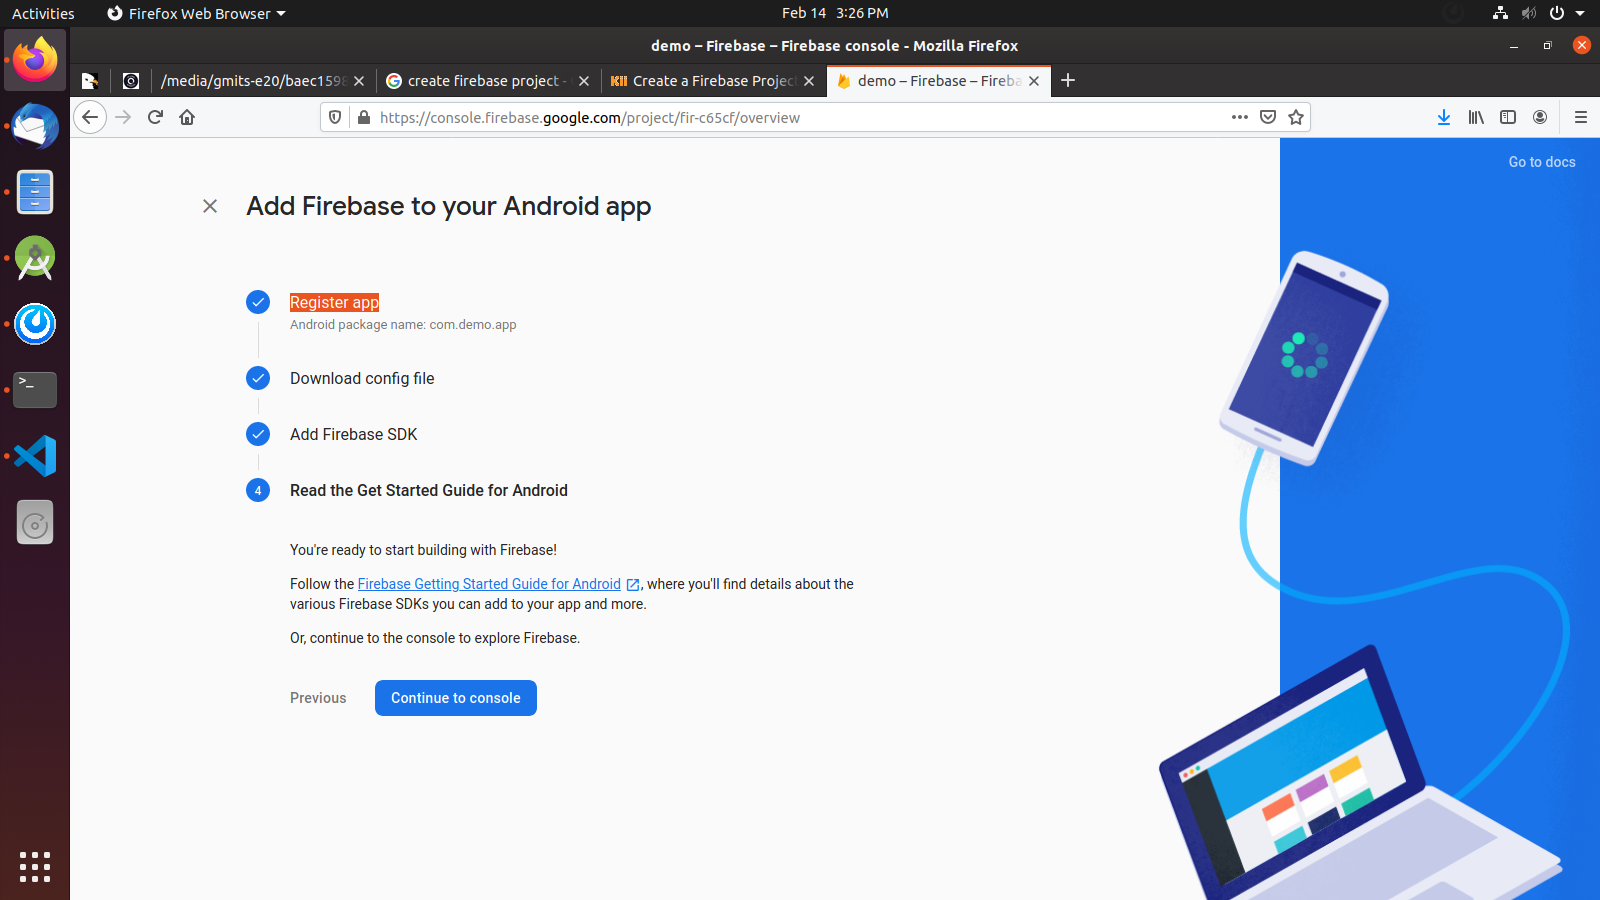
- Add Firebase to your Android app. Also download json file for future
refrences.
Create New Account on OneSignal
OneSignal is used for send push notification into mobile and web. Fore more details about OneSignal
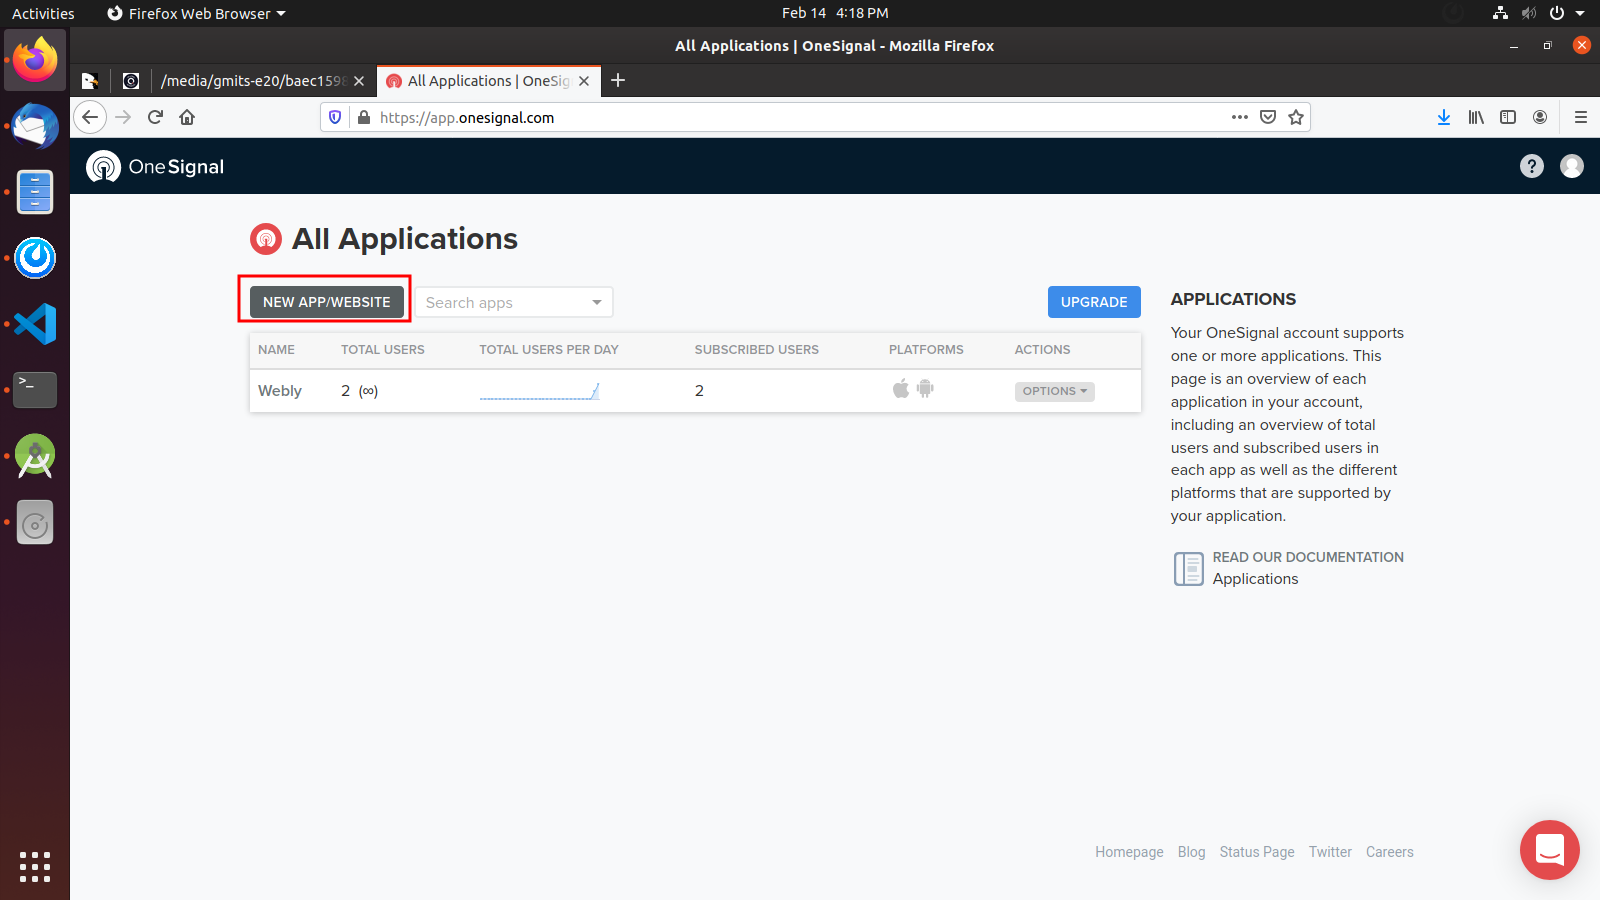
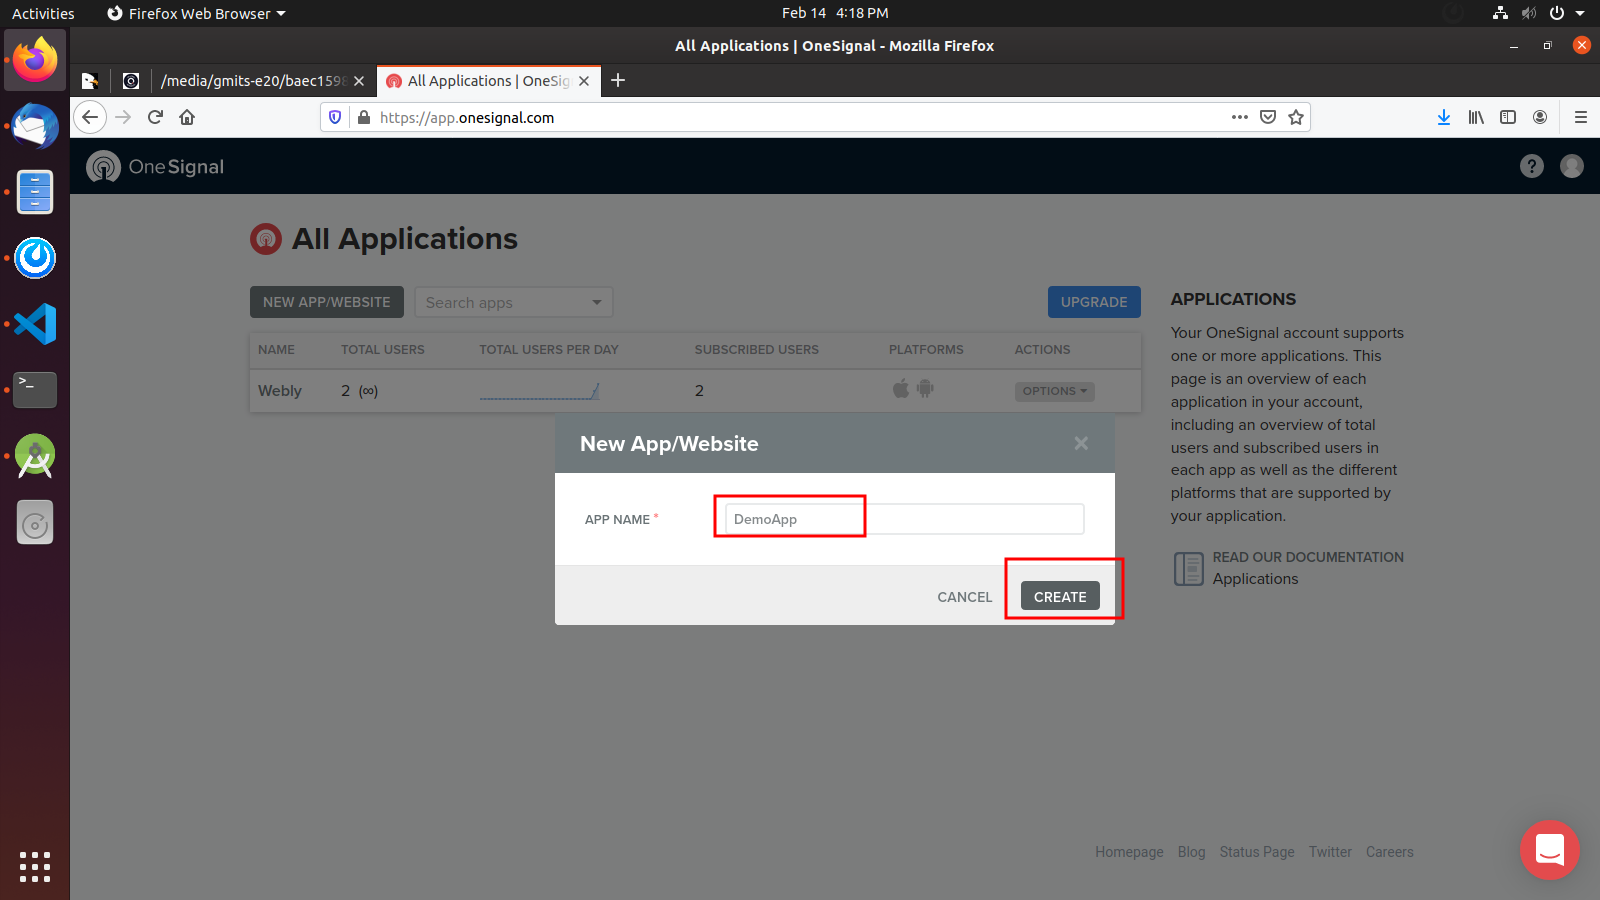
If you have own OneSignal then login and create project. If you does not have then register your account and create new project.
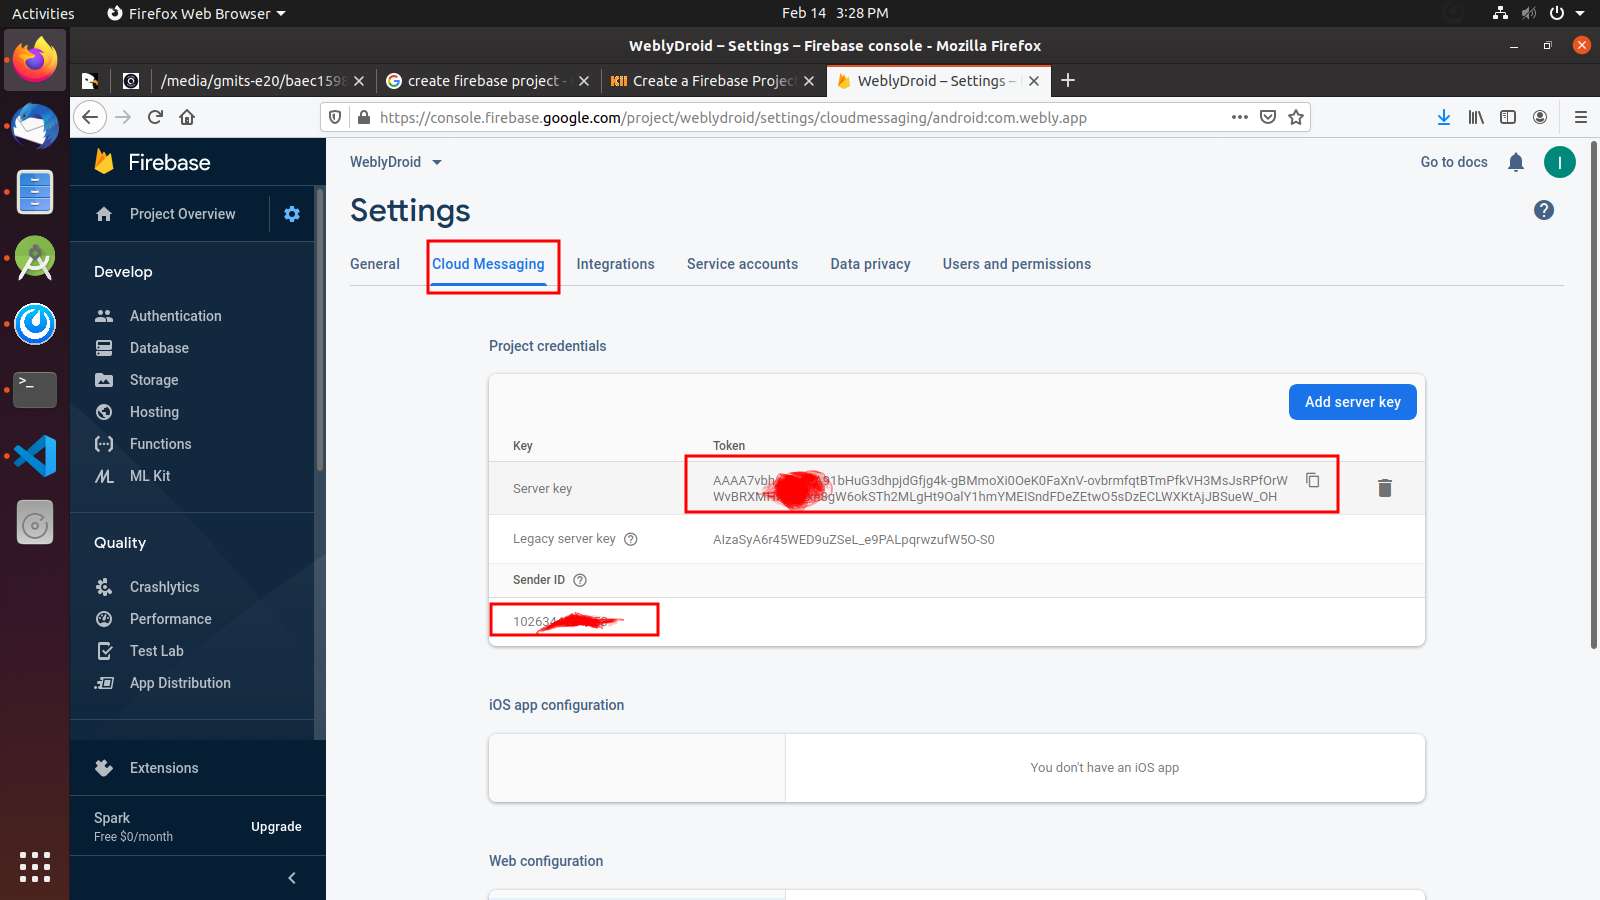
You create a project with the OneSignal.

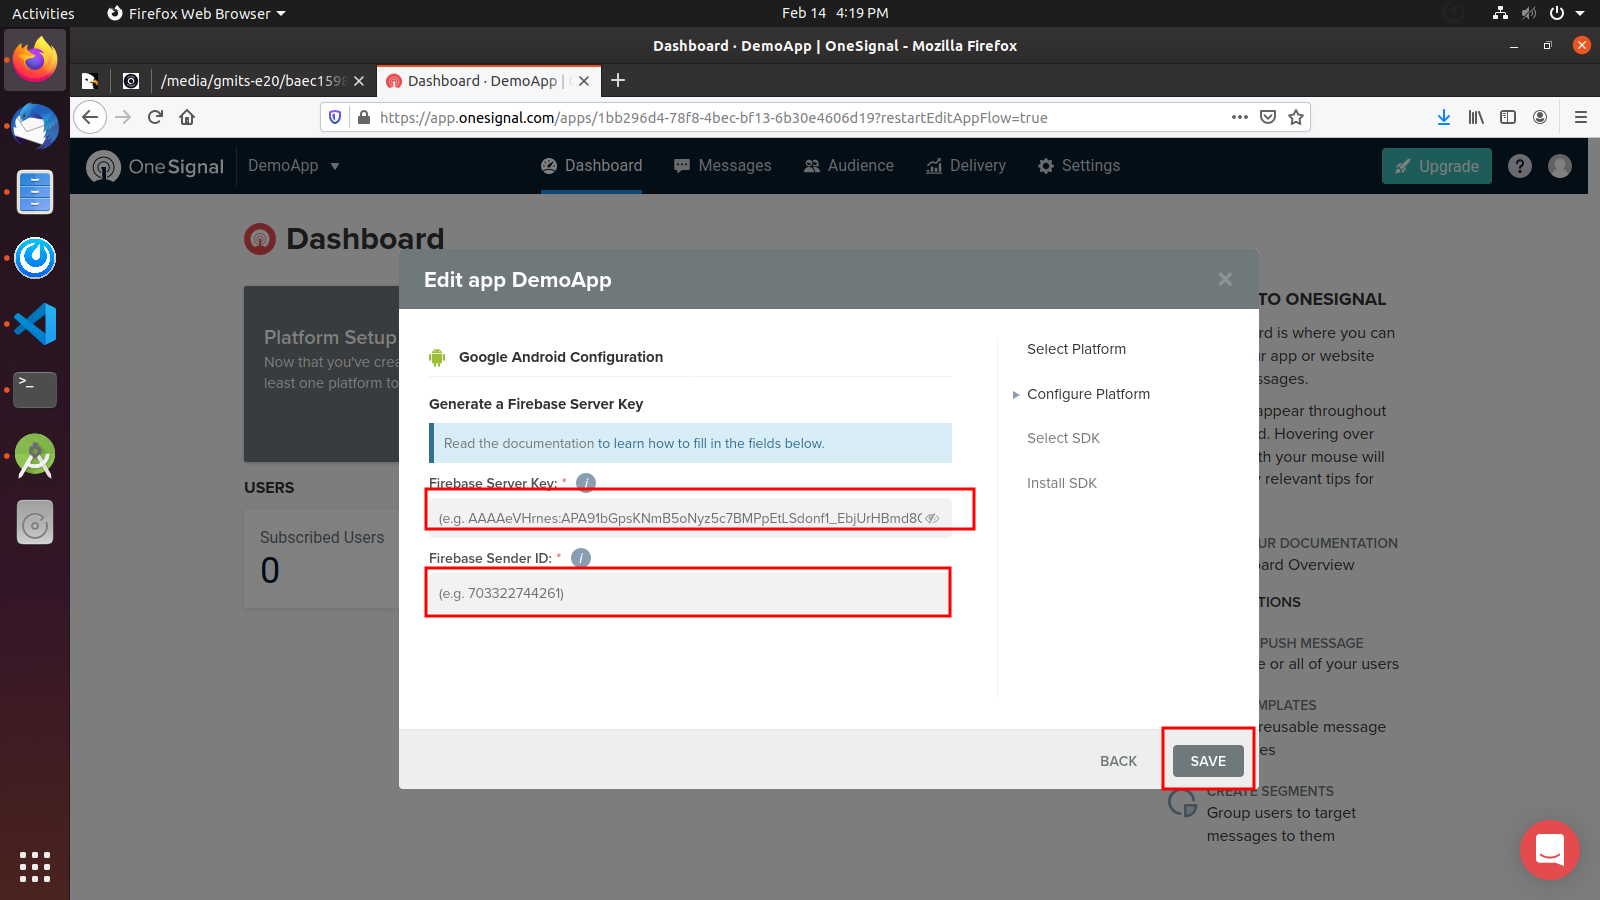
Goto Firebase app and copy your Firebase server key and Firebase sender id.

Follow the steps until your project is not ready.
Configure OneSignal on App
We have already added code for sdk and other configuration for onesingal push notification. You have to change your onesignal app id

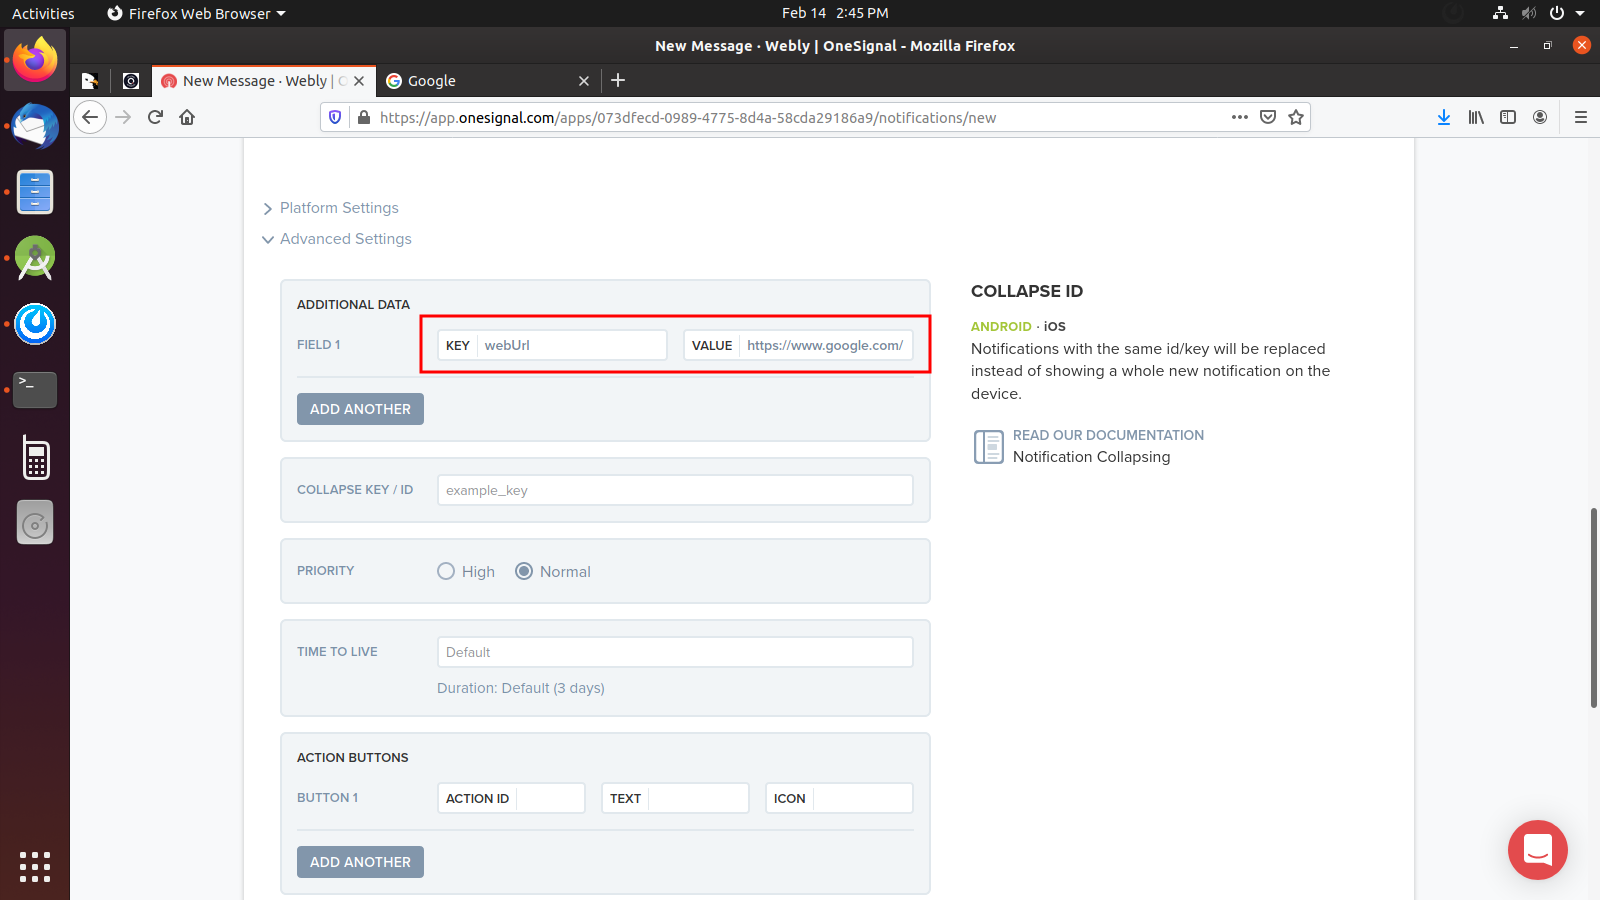
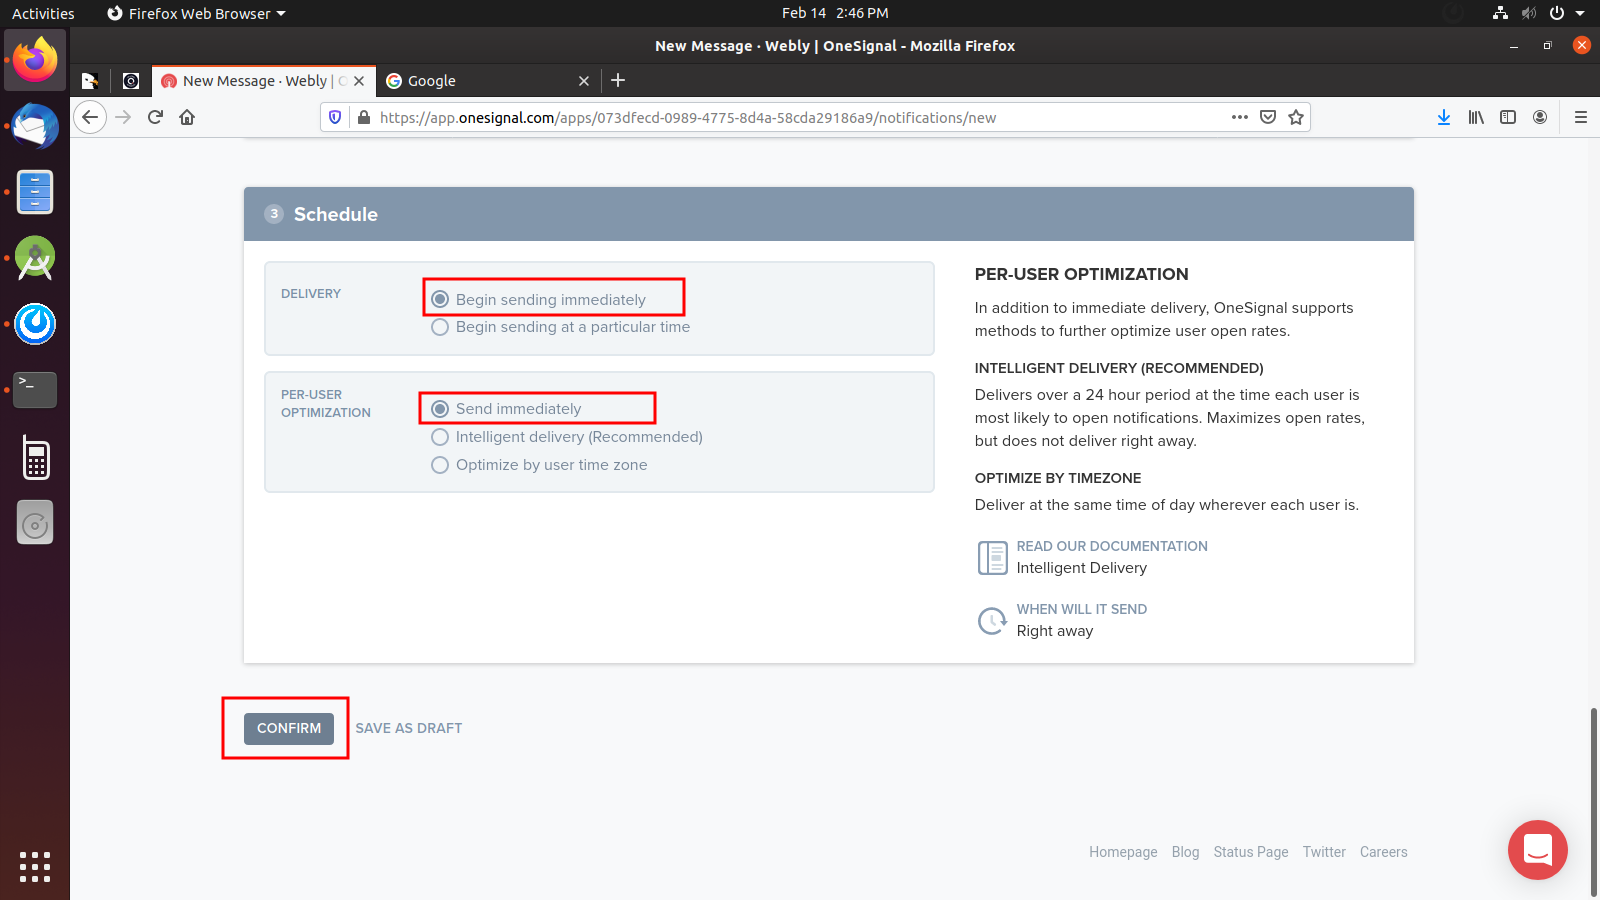
Send Push Notification
To send push notificaiton you need to follow below steps


If you want to show image on push notification then select below option with your image url

If you want to open some url when user click on notificaiton then select below option with custom key "webUrl"
NOTE: Compulsory Key is "webUrl"

Change App Language
To change app degault language then login with your wp-admin panel and follow below steps
- Goto App option
- Select Globle option
- Select your App Language and Click on "Save Changes" option
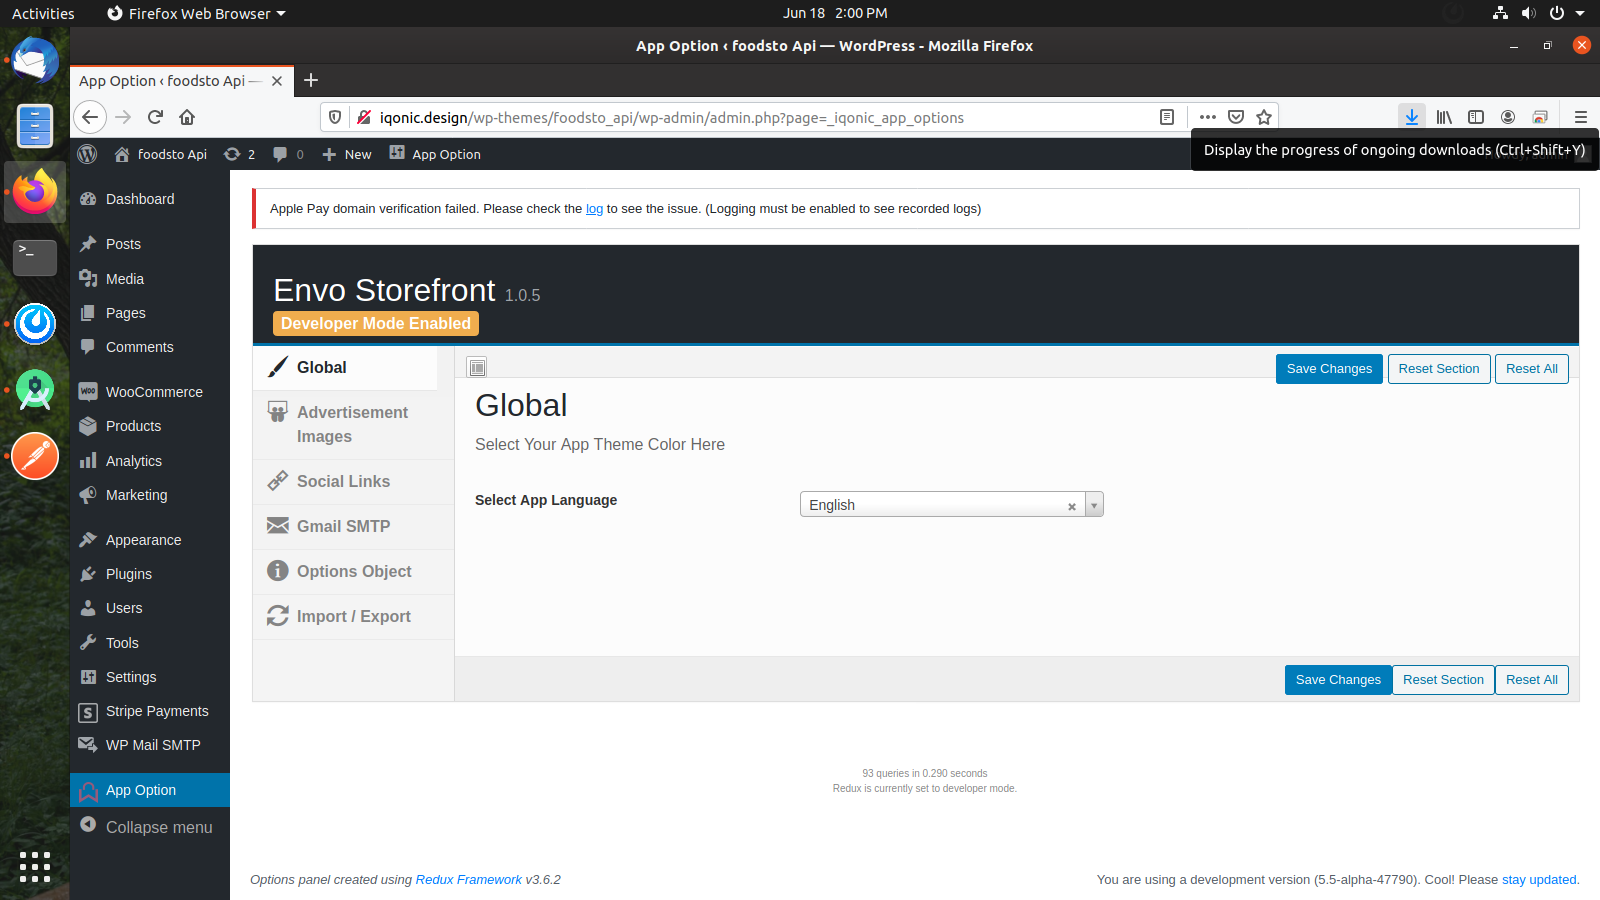
Note: Once you update your language your have to restart your app.
Remove coupon code functionality
If you dont want coupon code functionality at time of checkout process then just disable it from wp admin panel.
- Goto -> WooCommerce
- Select setting option
- Un-check "Enable coupons" option if it is checked
- Click on save changes

Note: Once you update your "Enable coupons" your have to restart your app.
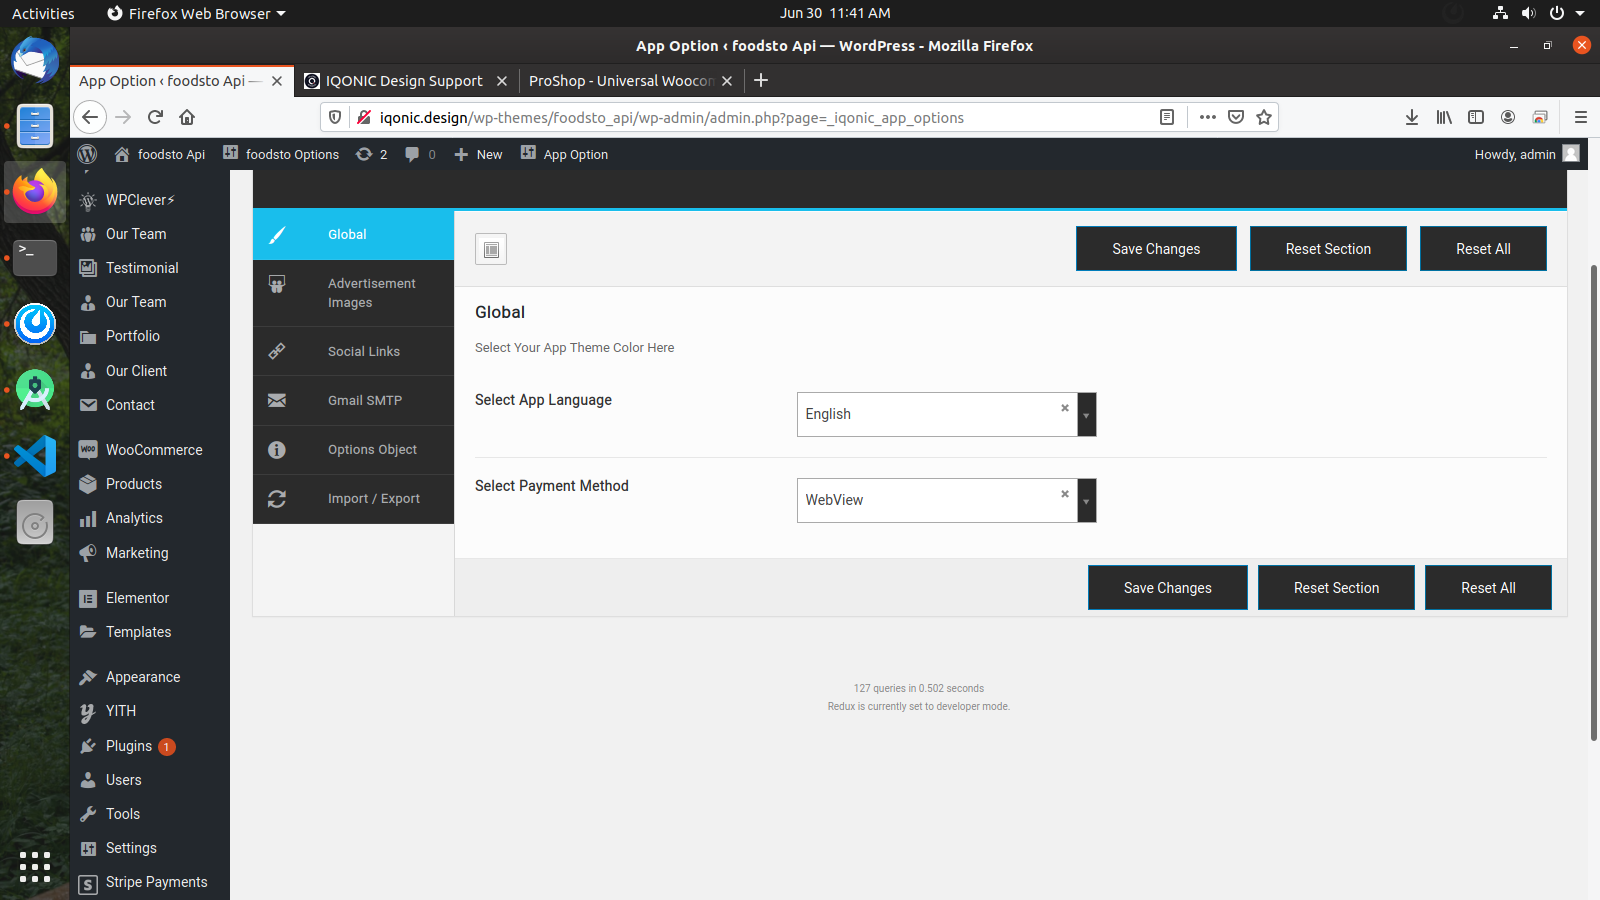
Change Payment method(Native/Webview)
Webview Payment: Support All payment gateway which is setup on wp-admin site
Native Payment: Support native payment gateway which is setup on mobile app
If you want change payment method like Native or webview. Follow below steps
- Goto -> App Option
- Select Global option
- Change "Payment Method"
- Click on save changes
Payment Option
Razorpay Payment gateway
Razorpay is the only payments solution in India which allows businesses to accept, process and disburse payments with its product suite. It gives you access to all payment modes including credit card, debit card, netbanking, UPI and popular wallets including JioMoney, Mobikwik, Airtel Money, FreeCharge, Ola Money and PayZapp.
Manage your marketplace, automate NEFT/RTGS/IMPS bank transfers, collect recurring payments, share invoices with customers - all from a single platform. Fast forward your business with Razorpay.
Click here For more details about Razorpay payment gateway
Generate API Key for payment key
Click here generate API Key for payment
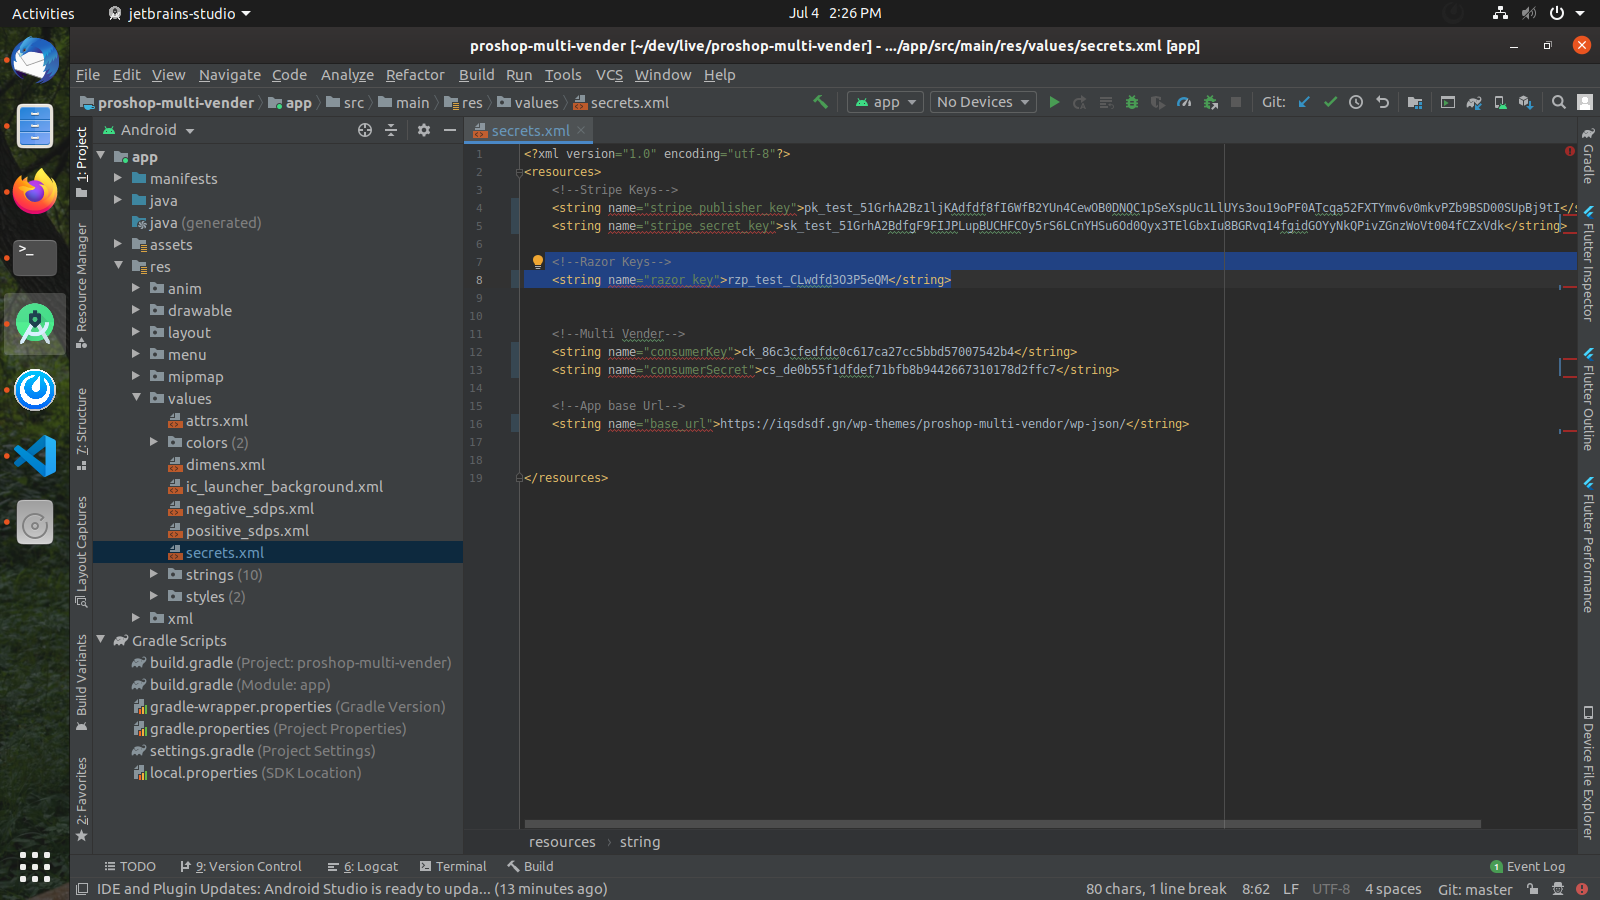
Note: You have to generate separate API Keys for the test and live modes. No real money is used in test mode.Change Razorpay Key
- Open secrets.xml file and replace your Razorpay key(Key Id) with "razor_key"
Remove Razorpay payment
We are recommended you to follow only second step if you don't know about dependency and code
If you want to remove Razorpay payment gateway option then follow below steps:
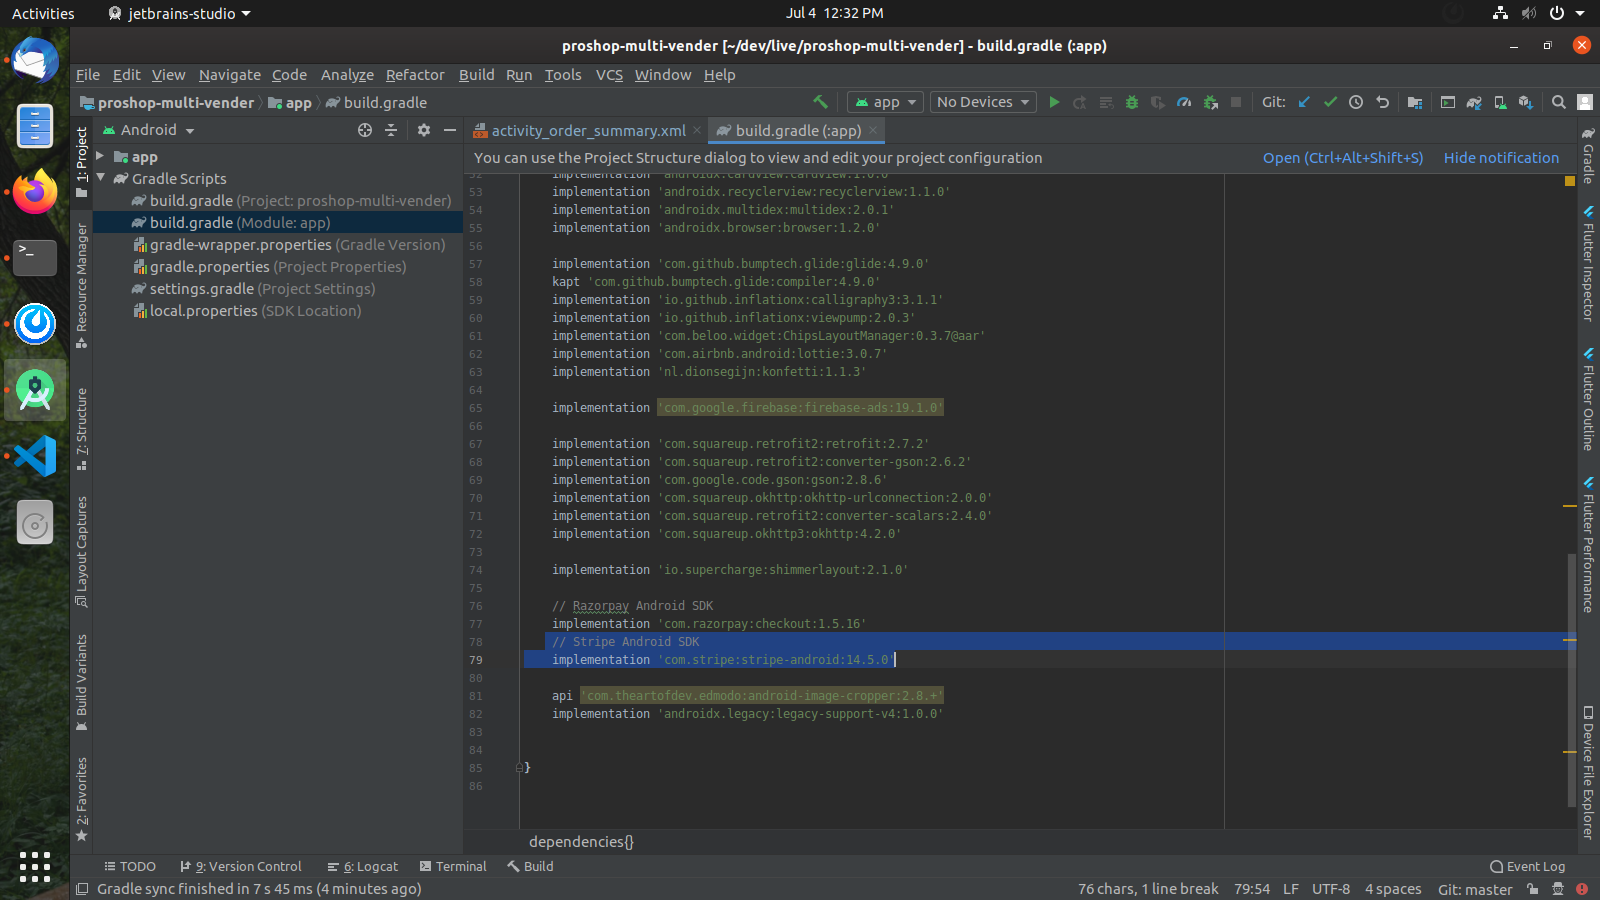
Step 1: Goto App level build.gradle file, find and remove below dependency line:
implementation 'com.razorpay:checkout:1.5.16'

Note: If you have remove dependency from build.gradle then also remove classes dependencies from related files
Step 2: Goto File -> App -> res -> layout -> activity_order_summary.xml file
Find "rbRazorpay" Radio Button and just set visibility as gone
For Ex: android:visibility="gone"

Stripe Payment gateway
The new standard in online payments
Stripe is the best software platform for running an internet business. We handle billions of dollars every year for forward-thinking businesses around the world.
Generate API Key for Stripe payment
Click here generate API Key for payment
Note: You have to generate separate API Keys for the test and live modes. No real money is used in test mode.Change Stripe Payment Key
- Open secrets.xml file and replace your Stripe Payment key with "stripe_publisher_key" and "stripe_secret_key"

Remove Stripe payment
We are recommended you to follow only second step if you don't know about dependency and code
If you want to remove Stripe payment gateway option then follow below steps:
Step 1: Goto App level build.gradle file, find and remove below dependency line:
implementation 'com.stripe:stripe-android:14.5.0
Note: If you have remove dependency from build.gradle then also remove classes dependencies from related files
Step 2: Goto File -> App -> res -> layout -> activity_order_summary.xml file
Find "rbCard" Radio Button and just set visibility as gone
For Ex: android:visibility="gone"

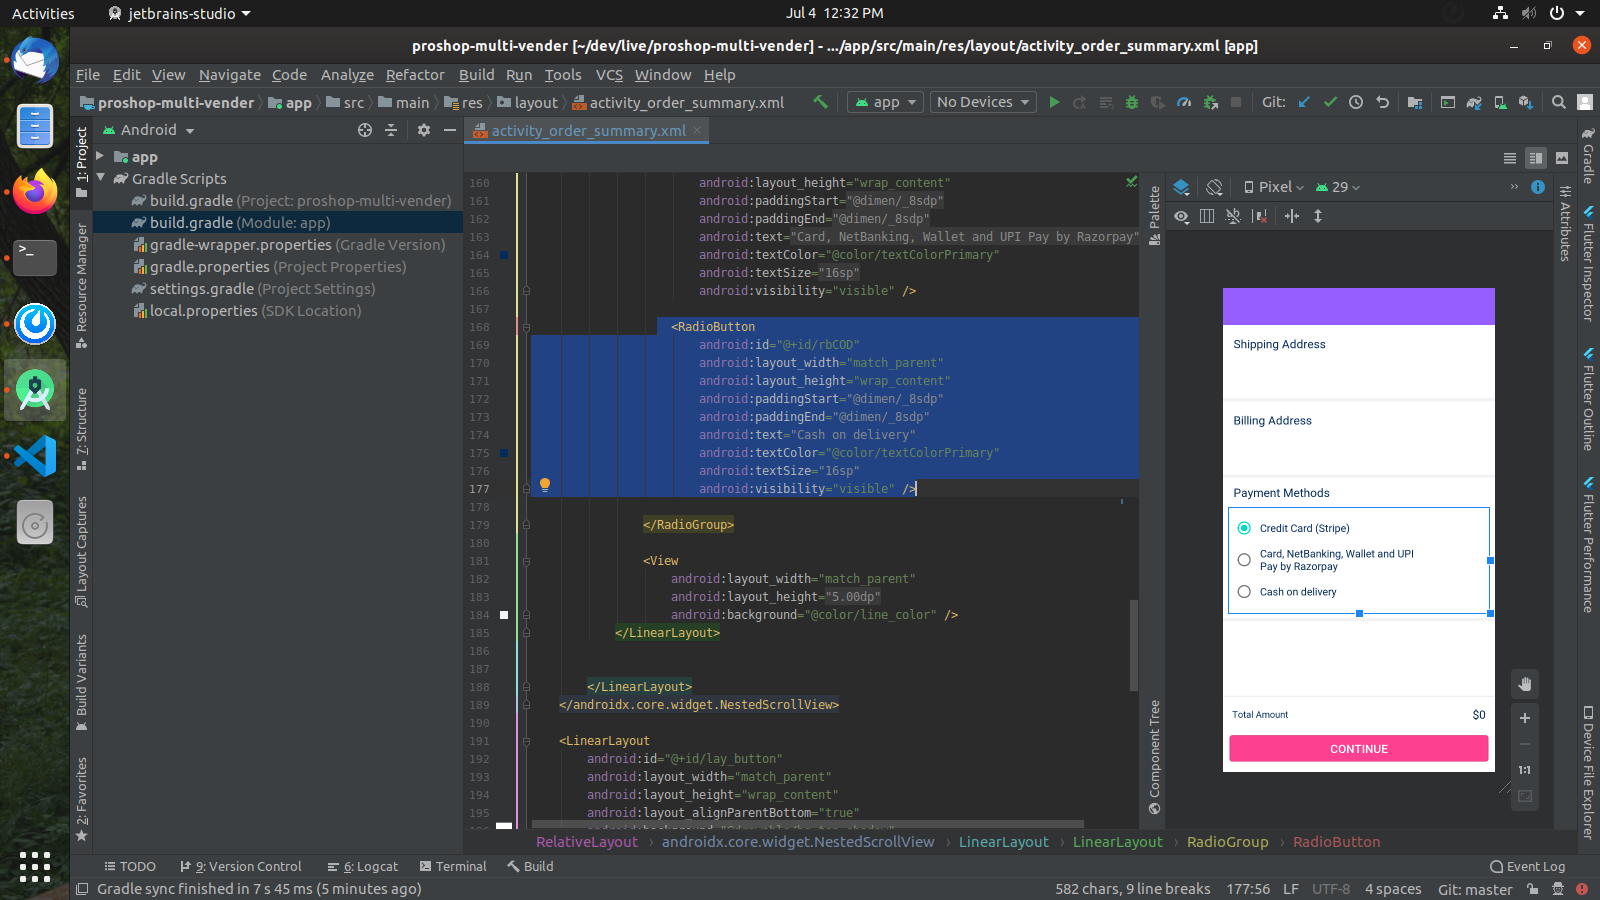
Remove Cash on delivery option
If you want to remove Stripe payment gateway option then follow below:
Goto File -> App -> res -> layout -> activity_order_summary.xml file
Find "rbCOD" Radio Button and just set visibility as gone
For Ex: android:visibility="gone"
New Payment gateway
If you want to add your new payment gateway then buy our paid support for the same.
Testing Credentials
Here we have provided some of testing credentials for app
Use Only in Test Mode: You can use these test cards to make payments in test mode only. Using these for live mode payments will throw card issuer is invalid or invalid card input error.Test Cards Details for stripe payment
There are several test cards you can use in test mode to make sure this integration is ready. Use them with any CVC, postal code, and future expiration date.| Number | Description |
| 4242 4242 4242 4242 | Succeeds and immediately processes the payment. |
| 4000 0025 0000 3155 | Requires authentication. Stripe will trigger a modal asking for the customer to authenticate. |
| 4000 0000 0000 9995 | Always fails with a decline code of insufficient_funds. |
Test Cards Details for razorpay payment
There are several test cards you can use in test mode to make sure this integration is ready. Use them with any CVC, postal code, and future expiration date.| Number | Description |
| 5104 0155 5555 5558 | Mastercard: Test Card for Domestic Payments |
| 4111 1111 1111 1111 | Visa: Test Card for Domestic Payments |
| 5555 5555 5555 4444 | Mastercard: Test Card for International Payments |
| 4012 8888 8888 1881 | Visa: Test Card for International Payments |
Common ErrorHandling
Error: Authorization header not found
Code: jwt_auth_no_auth_headern
Message: Authorization header not found
If you faced this error during development then this error due to header not set on your admin panel
Solution: Just check Enable JWT Authentication section wordpress document to resolve this issue
Error: Expired token
Code: jwt_auth_invalid_token
Message: Expired token
This error occure due to Expired user token.
Solution: Logout and re-login to your android app
We are working on autologin system. we will update it soon.
How to update future release code to existing source code
Many have question on their minds. How can i update existing code with new changes if future release will come?
No worries - We are provided documentation which help you to update new changes into existing source code.
Just go through this Update Existing Code documenation link.
Support & Assistance
Faced a problem? Need assistance with the product? No worries – our customer support team is always ready to help you.
- Support requests are being processed on business days from 9:00 to 18:00 (GMT +05.30) [generally] within 24h to 48h in the order they were received.
- We suggest, while our team reviews your support request, please read the documentation that comes in the zip file of Codecanyon. You can download it from ThemeForest: https://codecanyon.net/downloads
- We are in GMT+5:30 timezone. We address all the support queries 6 days weekly (Sunday off).
- If any support ticket has no response from the item owner for 7 days, the ticket will be considered closed. If you need further assistance you can create another ticket or drop us an email asking to re-open the ticket for you.
- Have pre-sales questions or concerns, please write to us via our website contact page
- If you like our product and support then please drop a rate and write a review at: https://codecanyon.net/downloads
Note:We have launched our support portal on Desky. Please raise a ticket here at https://iqonic.desky.support/
Refund Policy
- We don't offer a refund. (If the item is downloaded)
- Please read the description and compatibility content thoroughly before purchasing as we don't offer a refund if you buy it by mistake.
Greetings from Iqonic Design
We are actively looking forward to your feedback in order to make our product more efficient for you. Thanks again!
FAQ
Q: Does it support Multivendor Marketplace?
Ans: Yes
Q: Is this support of coupon code functionality?
Ans: Yes
Q: Is this compatible with Fashion and grocery store?
Ans: Yes