“ WooBox - Native iOS App Swift 4 for WooCommerce ”
Created: 15/02/2020
Updated: 15/02/2020
By: IqonicDesign
Email: [email protected]
We are following CodeCanyon rules and regulation, so under this licenses you can only publish single product on play store. And you can't sell this source code anywhere. Please follow Standard Licenses: https://codecanyon.net/licenses/standard/

Basic Installation
To develop app you need to set up an Xcode.
Xcode Setup Process
- Download Xcode - https://apps.apple.com/in/app/xcode/id497799835?mt=12
- Install Xcode - https://developer.apple.com/support/xcode/
- Learn more about Xcode - https://developer.apple.com/xcode//
iOS App Configuration
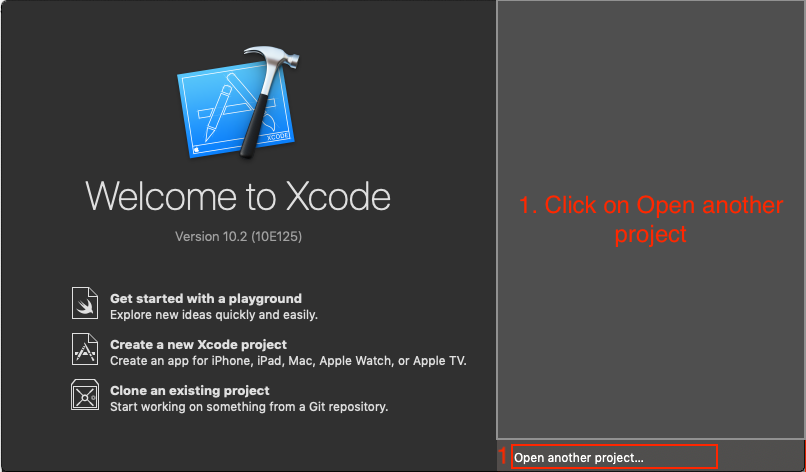
Open project in Xcode
Step 1:- Select ‘Open another project’ option and find your Woobox App iOS Project
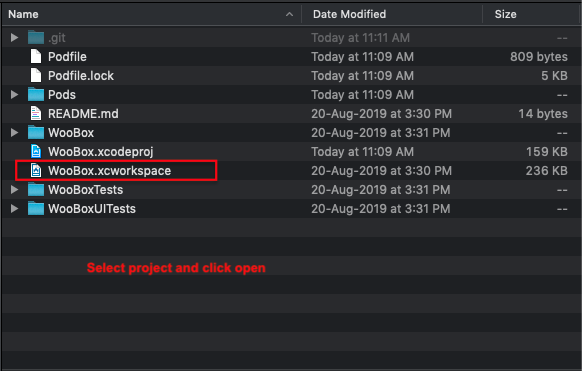
Step 2:- Select your current project then click Open button and wait few minute
How to change Bundle Identifier
- Click on the Woobox App project and change your Bundle Identifier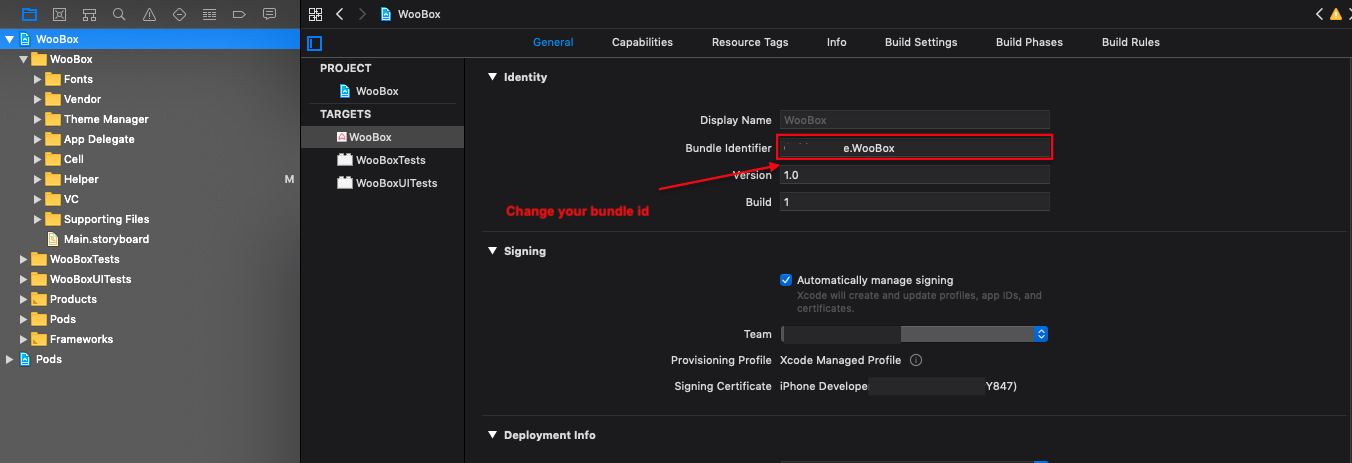
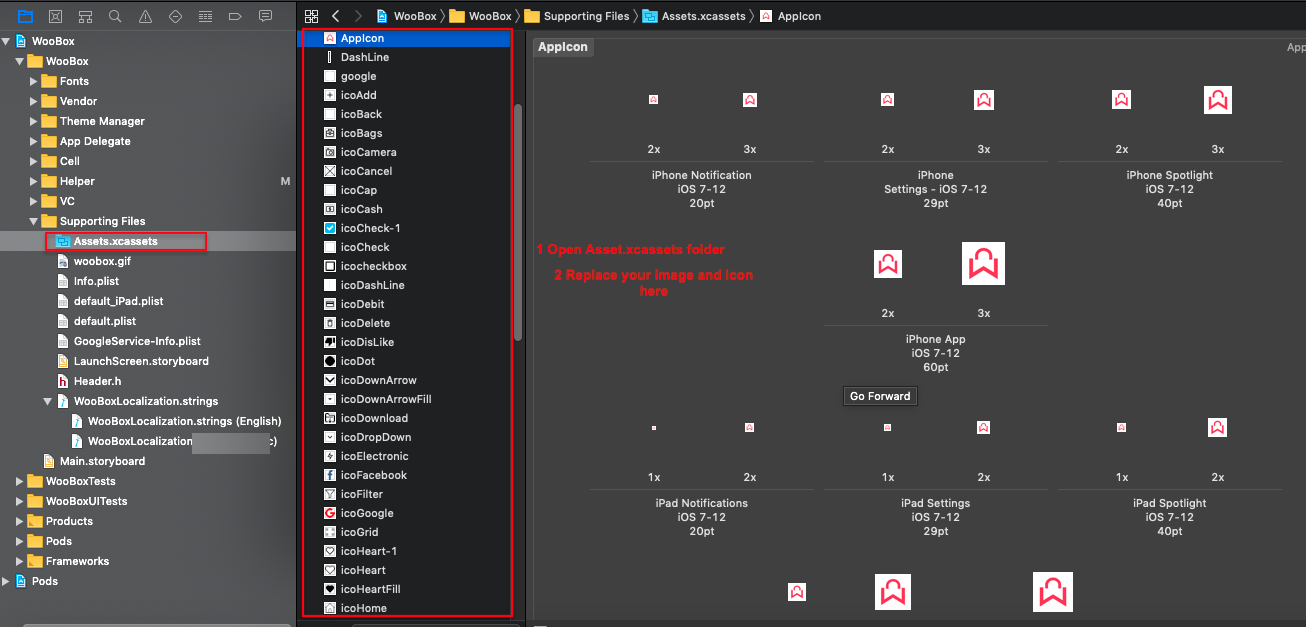
How to change Application menu icon, background and app icon
- Open Assets.xcassets folder inside you can see all the Images, icons and AppIcon Replace your background images and icons here.
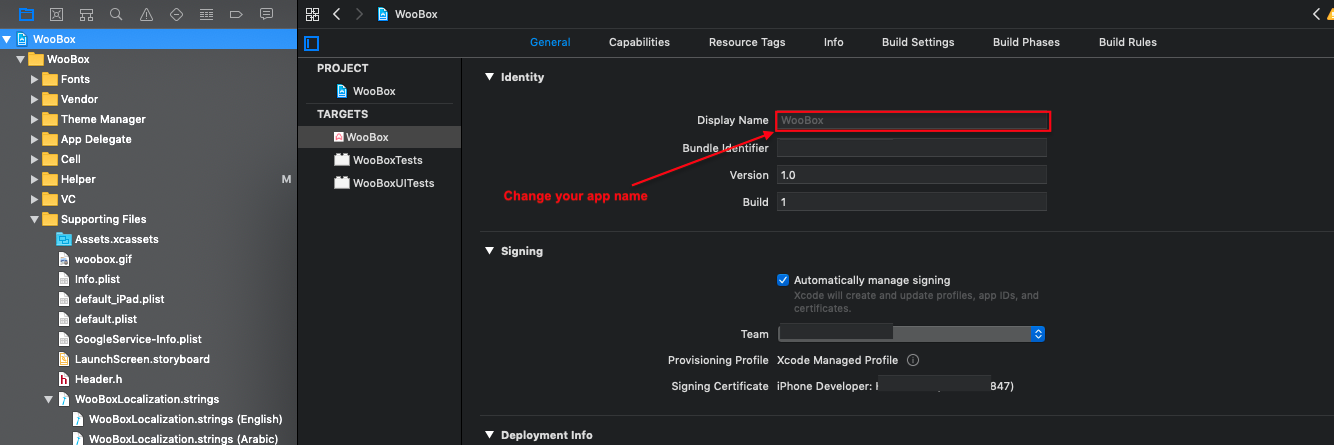
How to change Application name
- Click on the Woobox project and change your 'Display Name' here
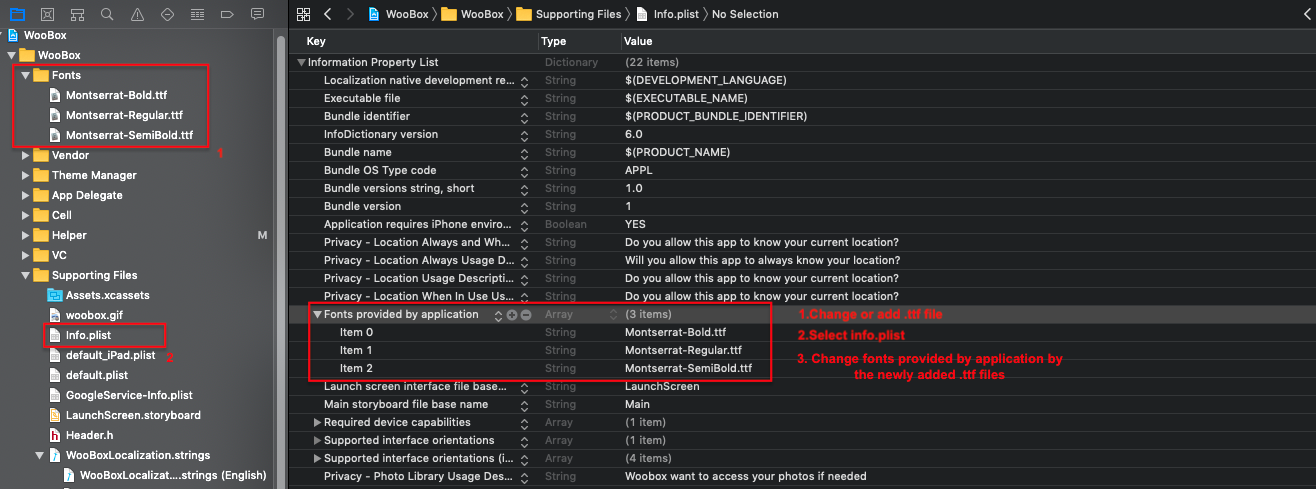
How to change app Font
- Click and open font folder, change or add .ttf files
- Select Info.plist
- Change Fonts provided by application by the newly added .ttf files
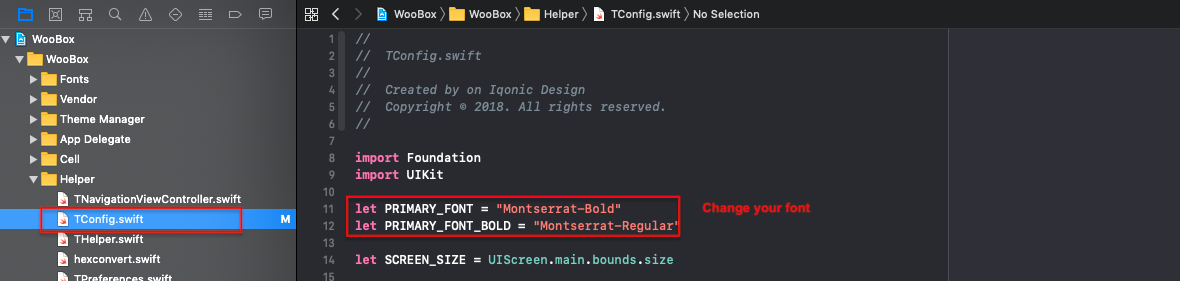
- Go to TConfig.swift file in Helper folder and add the font name to constant.
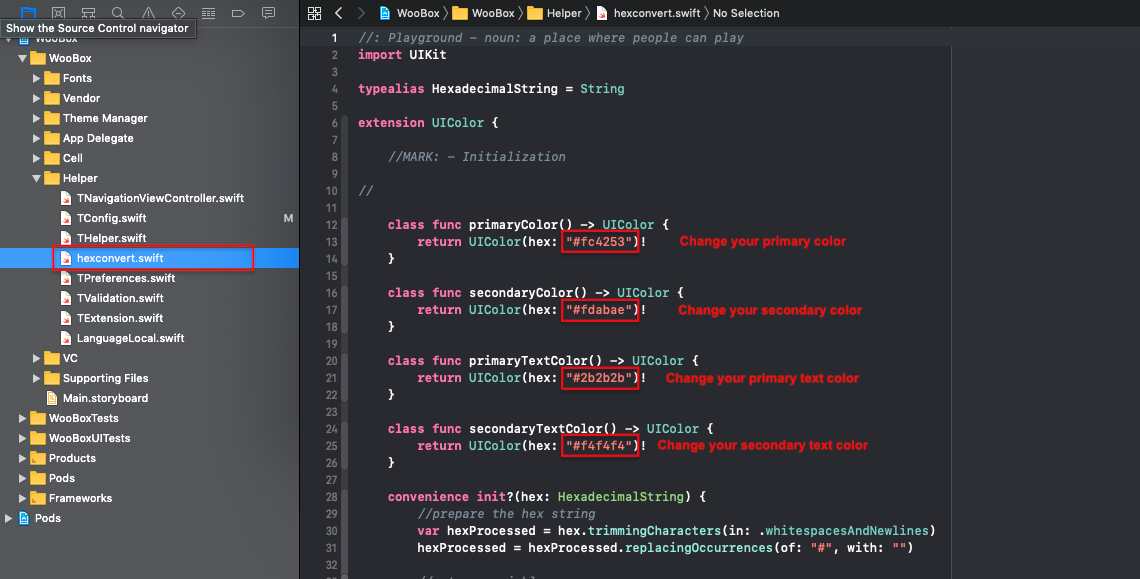
How to change app color
- Go to hexaconvert.swift file open and change color
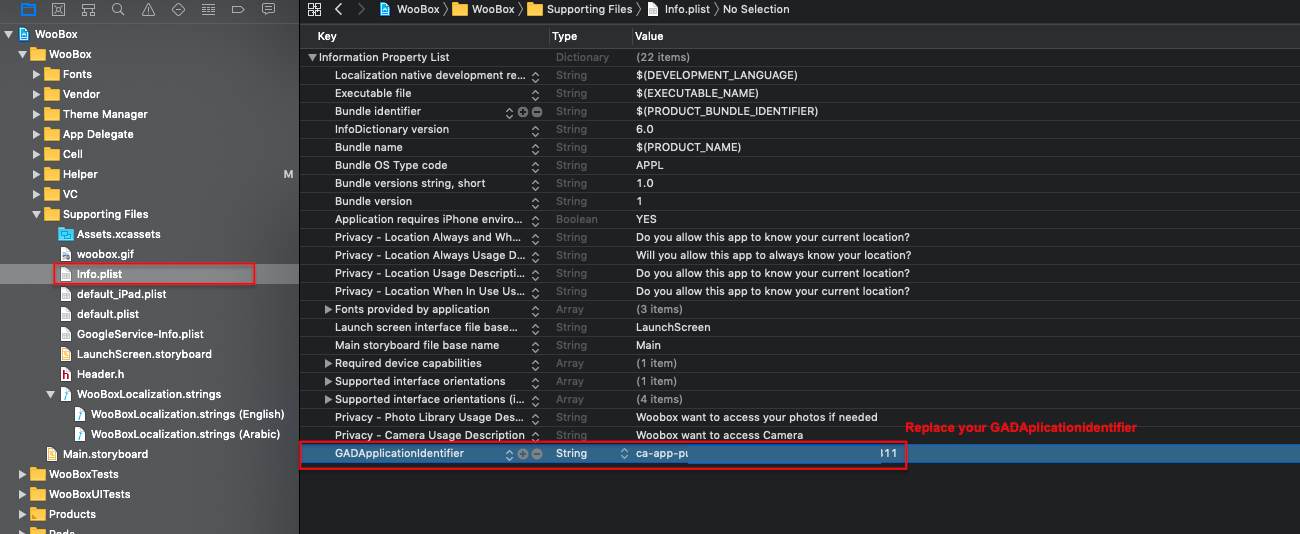
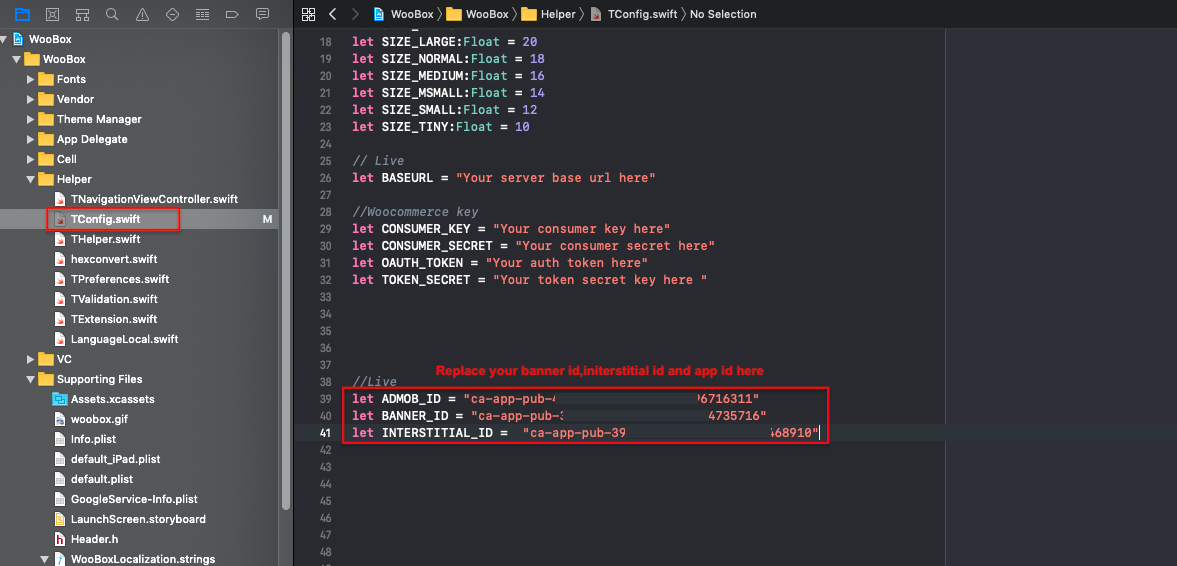
How to add AdMob Ads.
- Add GADApplicationIdentifier with App id to info.plist.
- Go to TConfig.swift file in Helper folder and add change Banner id and Interstitial id.
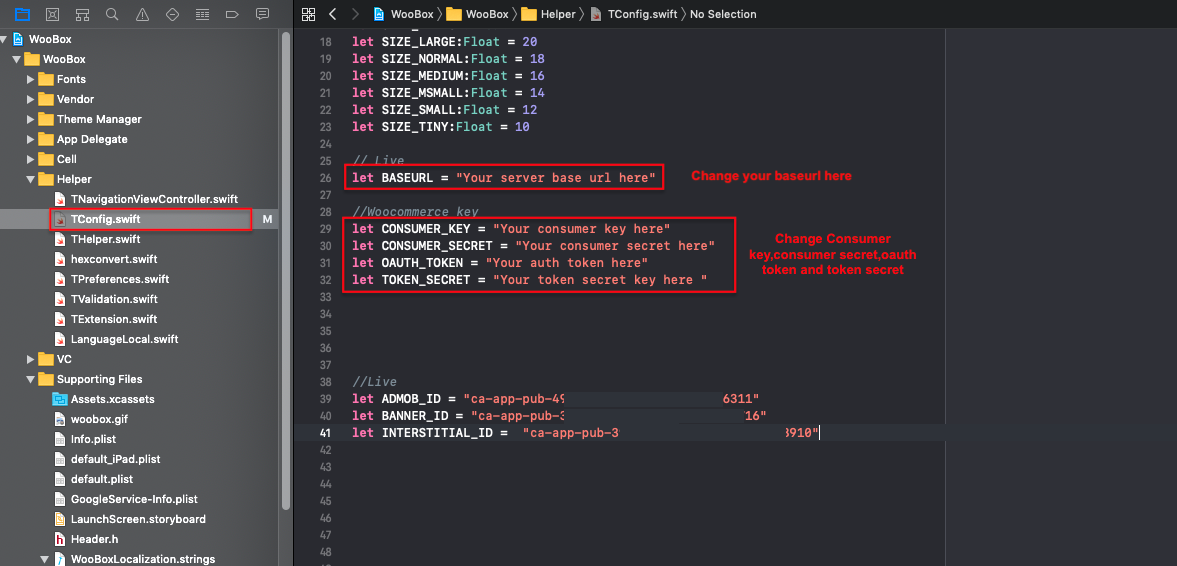
How to change server URL and Token
- Open Tconfig.swift file and change BASEURL String value.
- Change CONSUMER_KEY
- Change CONSUMER_SECRET
- Change OAUTH_TOKEN
- Change TOKEN_SECRET
How to change App Language.
Open Project.
Click on project.
Go to Info tab.
Click on + button under Localizations.

- A popup will open to select the language.
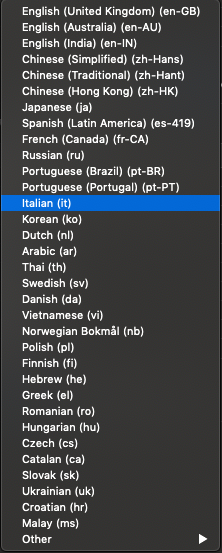
- Select .string file, unselect all other and click Finish.
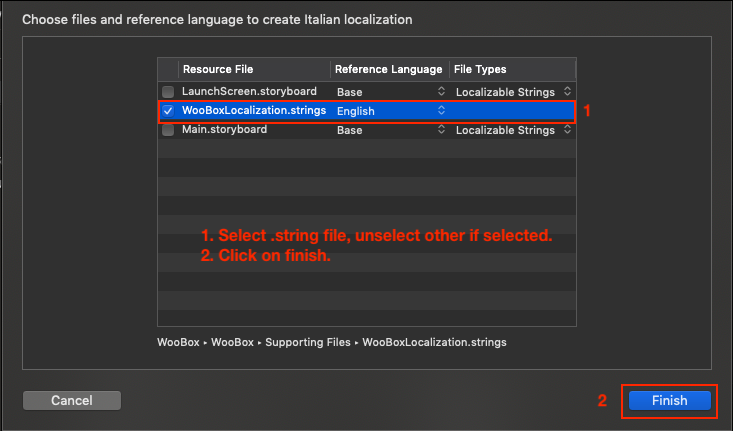
- A file of your selected language will be created.
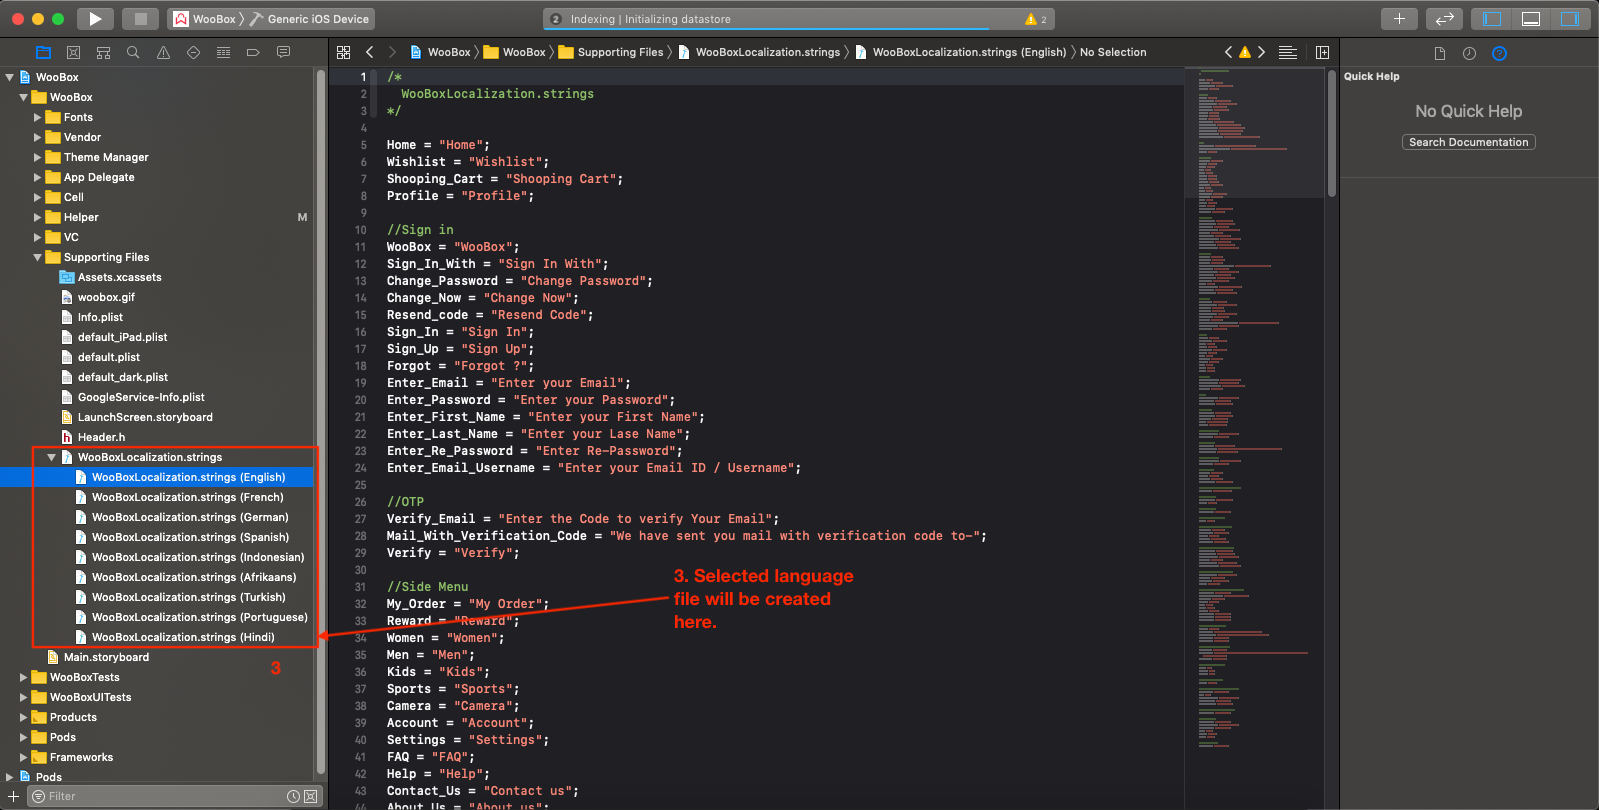
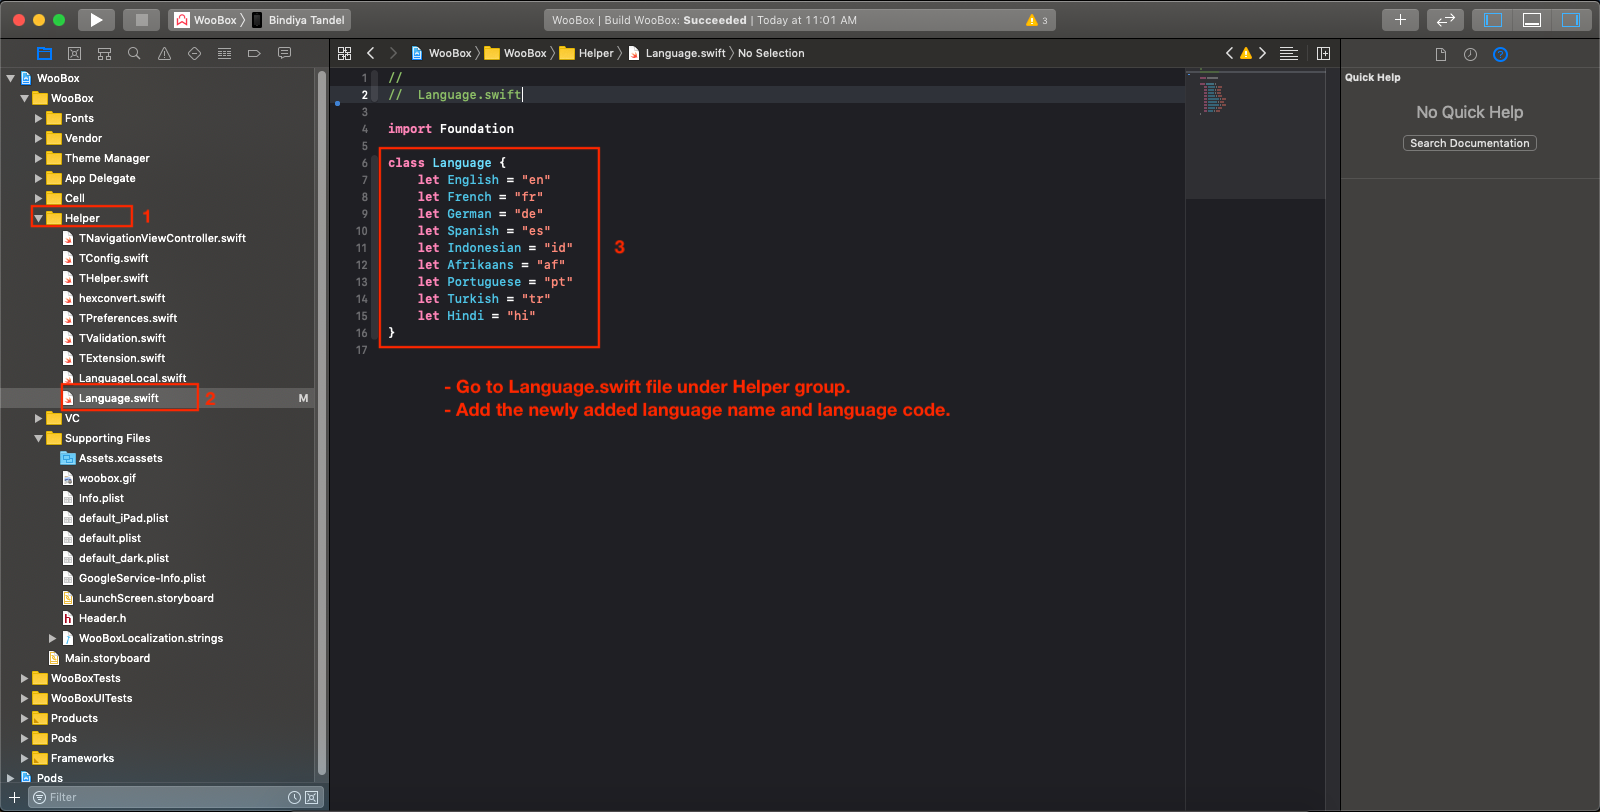
- Add language name and language code in Language.swift file.
Firebase Analytics
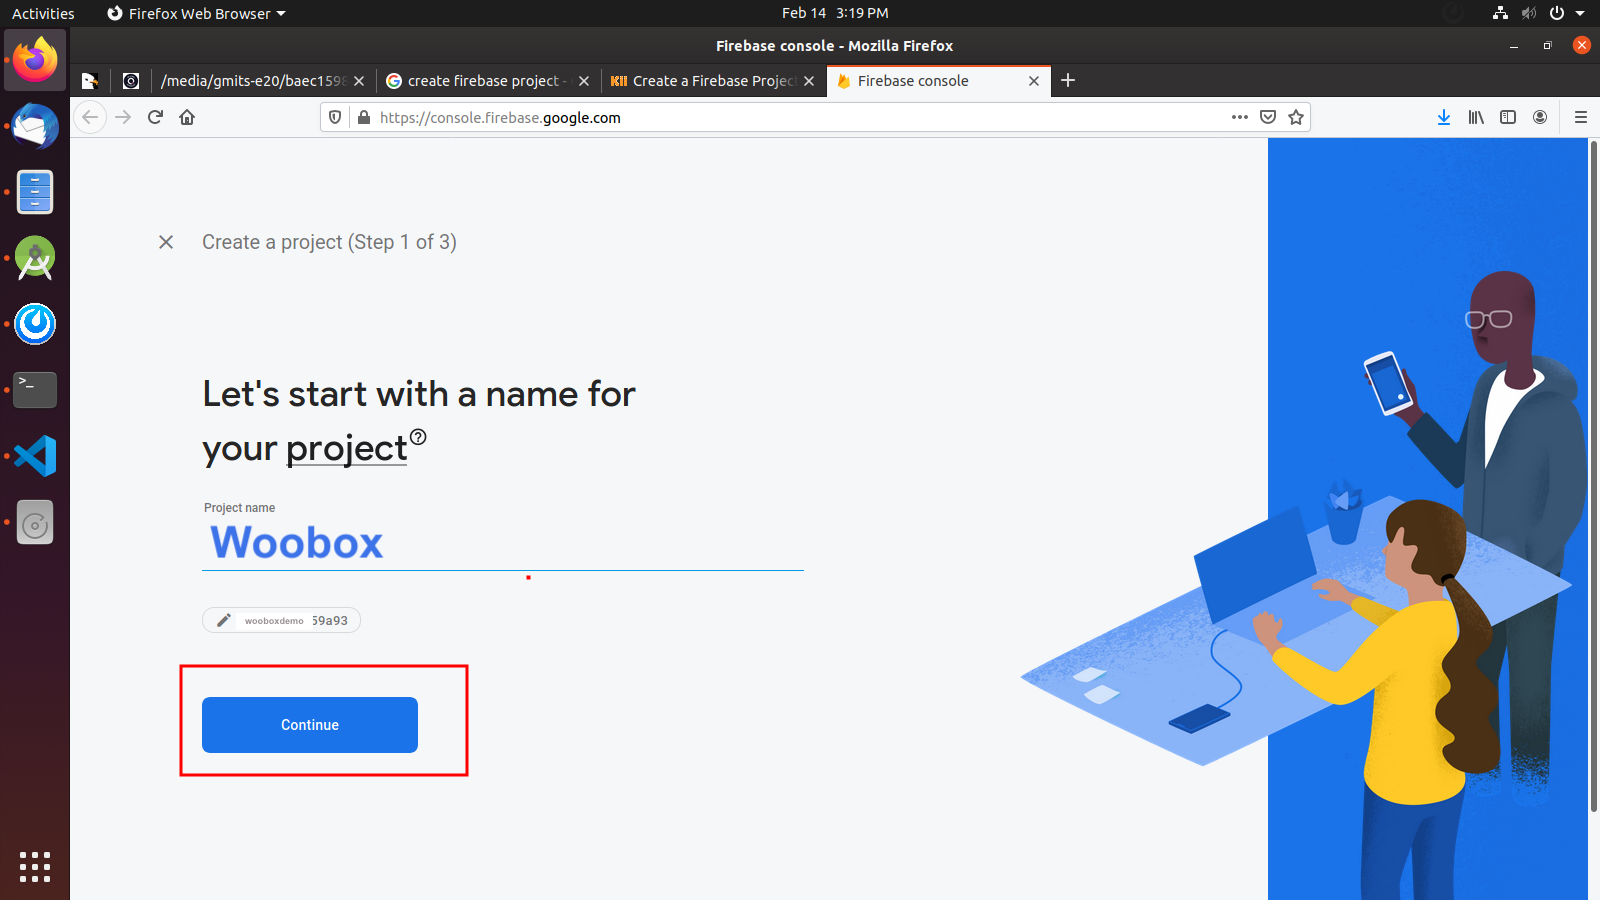
Create a Firebase Project
The first step is to create a project in the Google environment.
Note: You need to have been logged in with a Google account which can use the Firebase console in order to walk through this tutorial.
You create a project with the Firebase console.
Follow the steps below to create new project.
- Open the Firebase console.
- Click "Add Project" and follow the steps upto creation of project.
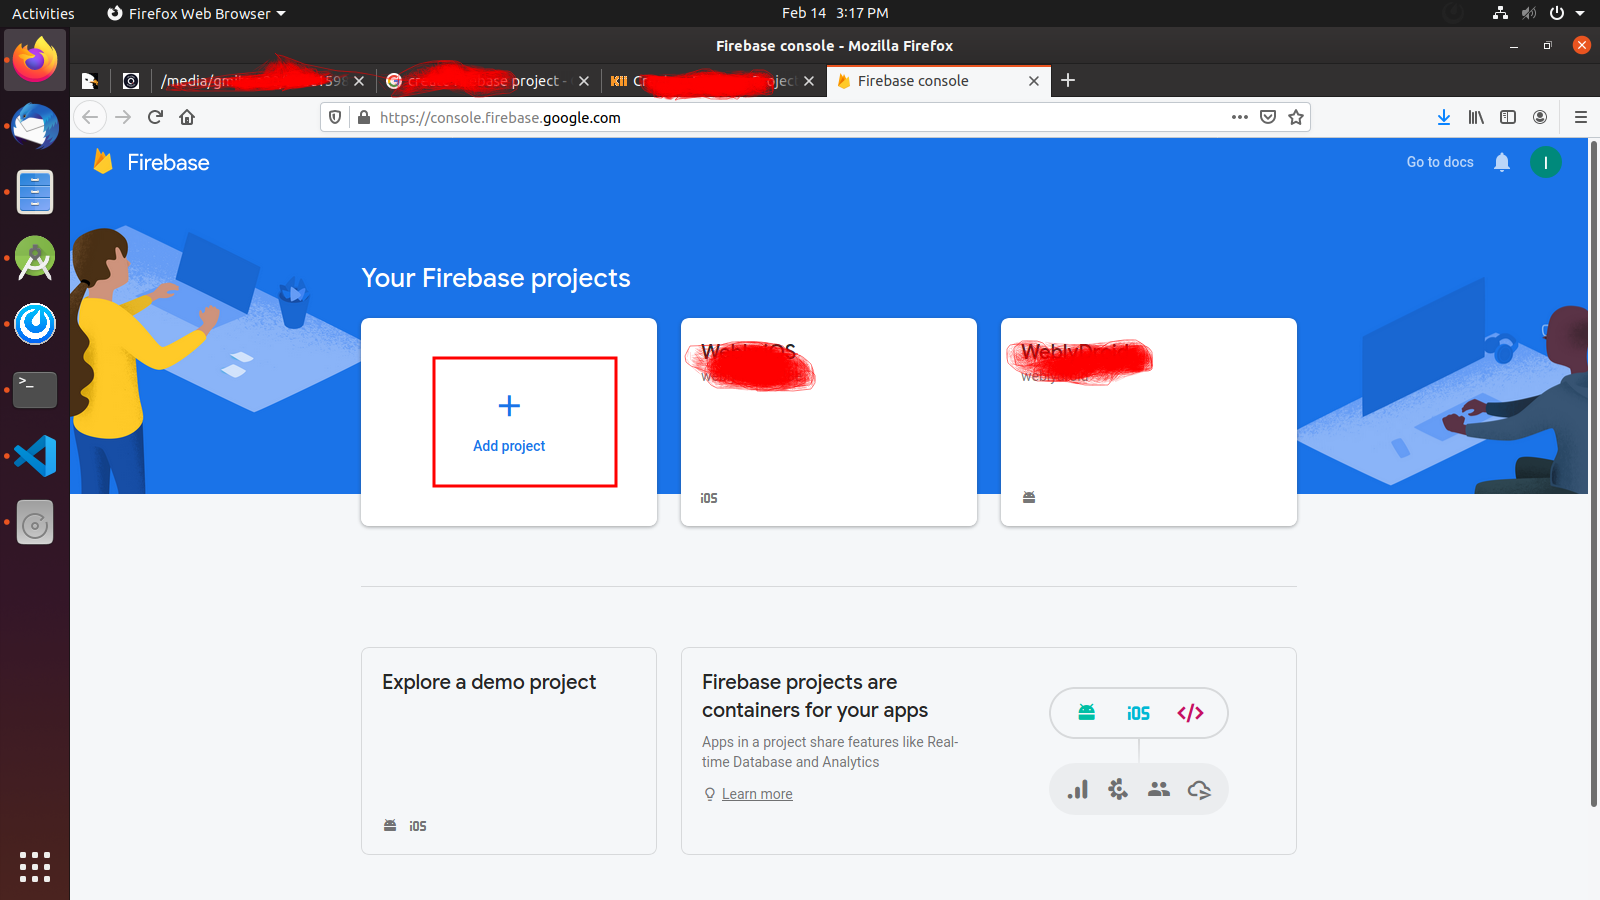
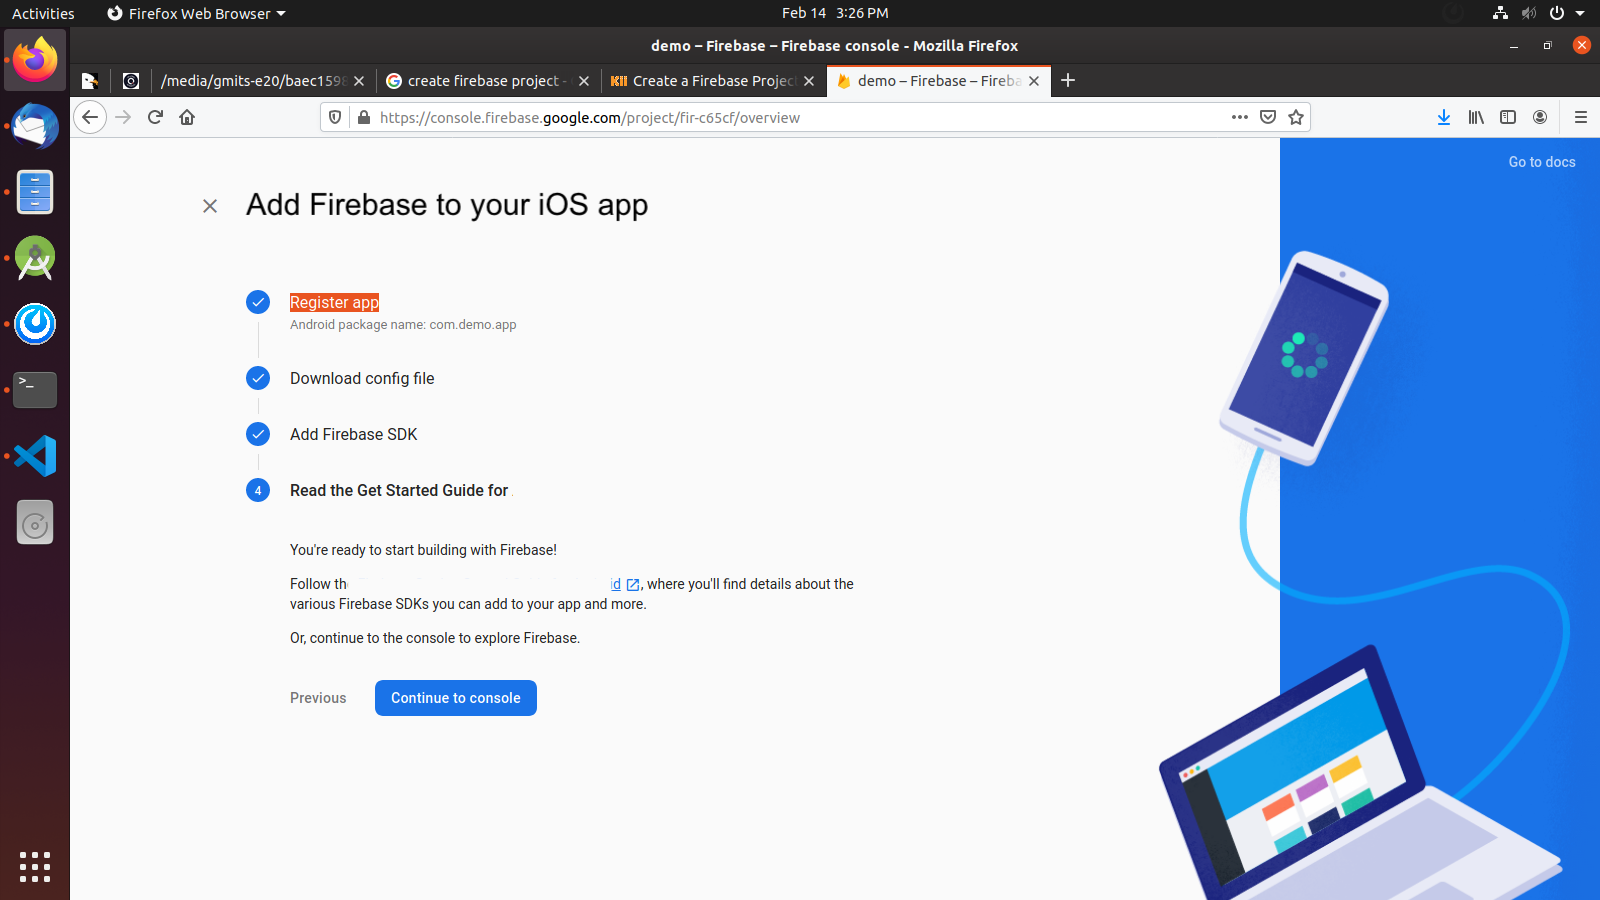
- After creation of project your screen looks like below.
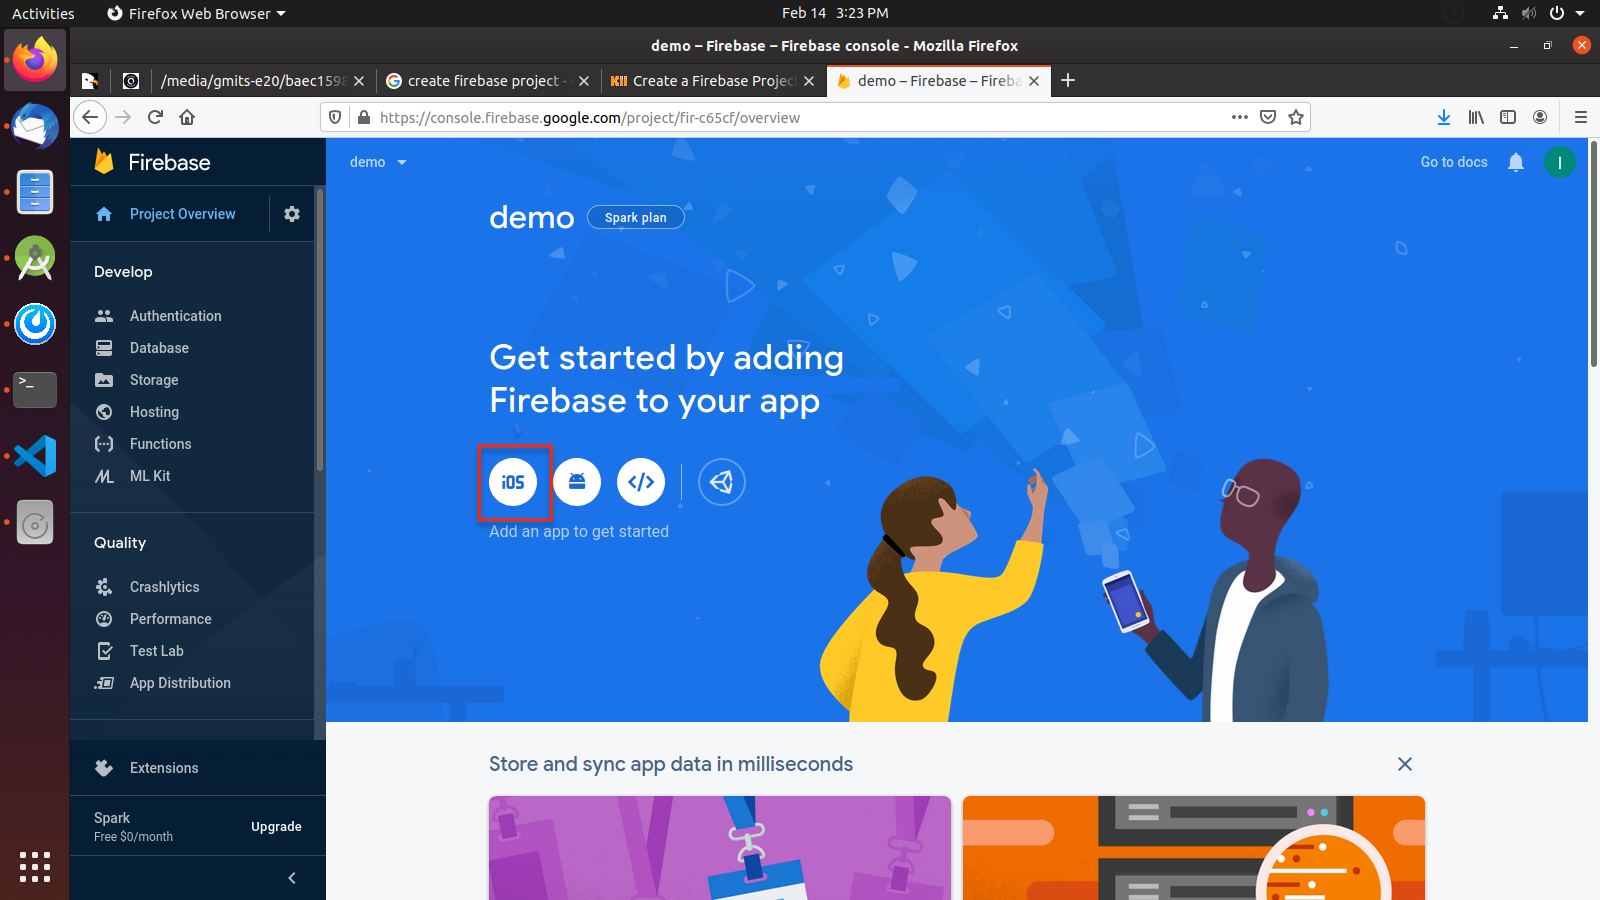
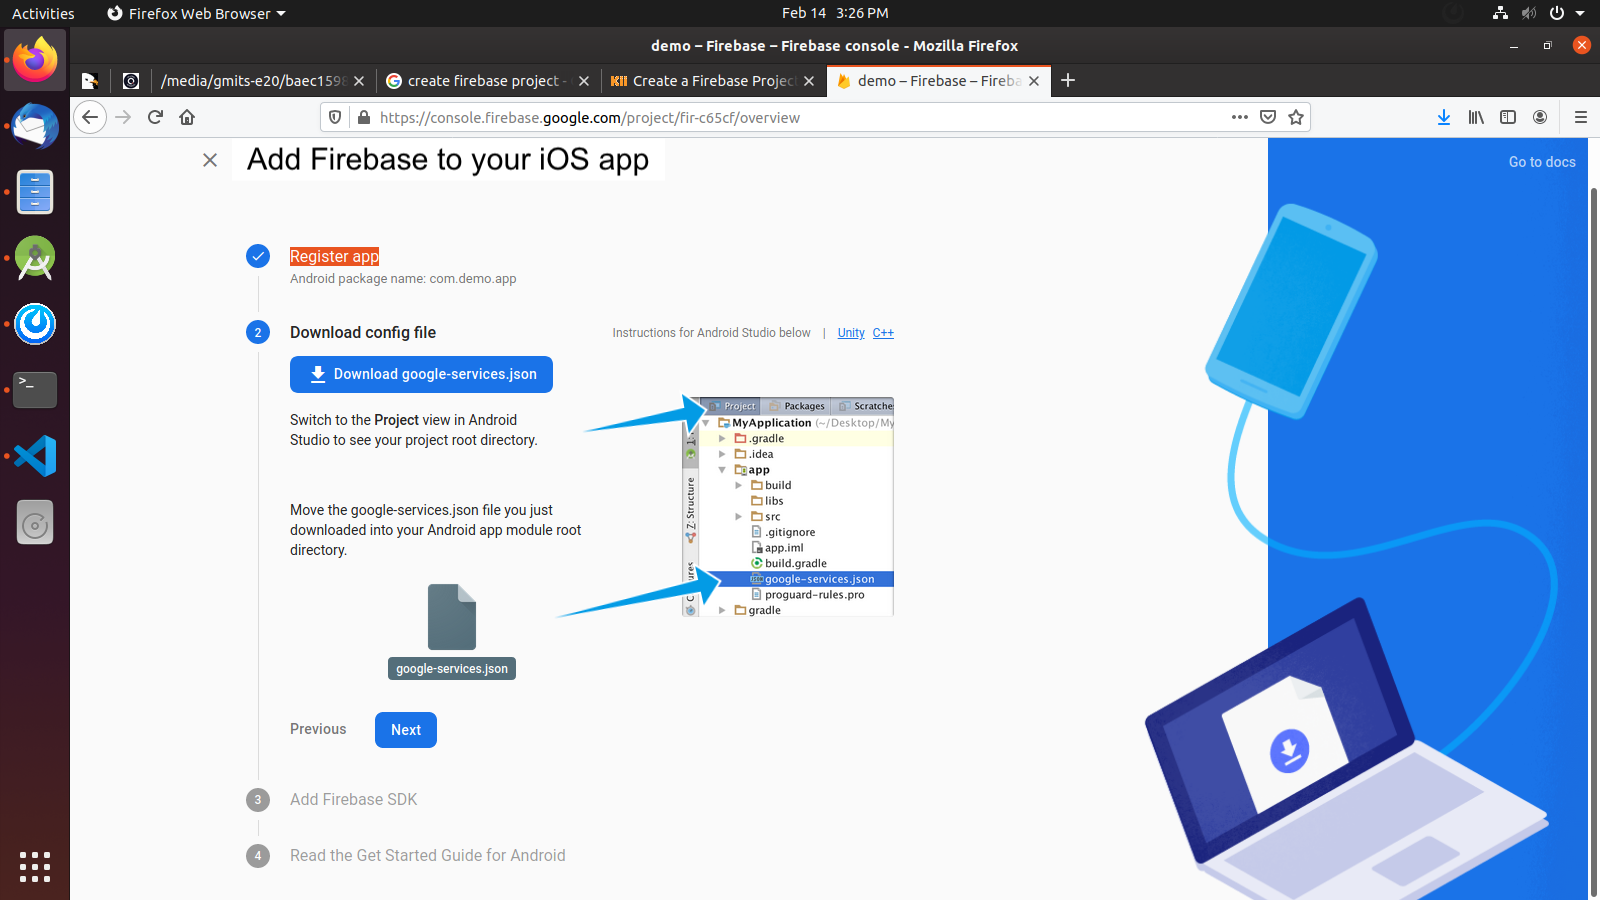
- Add Firebase to your iOS app. Also download json file for future
refrences.
Configure Firebase on App
We have already added code for sdk and other configuration for firebase.
You just enable some codes if you are want firebase support on your app
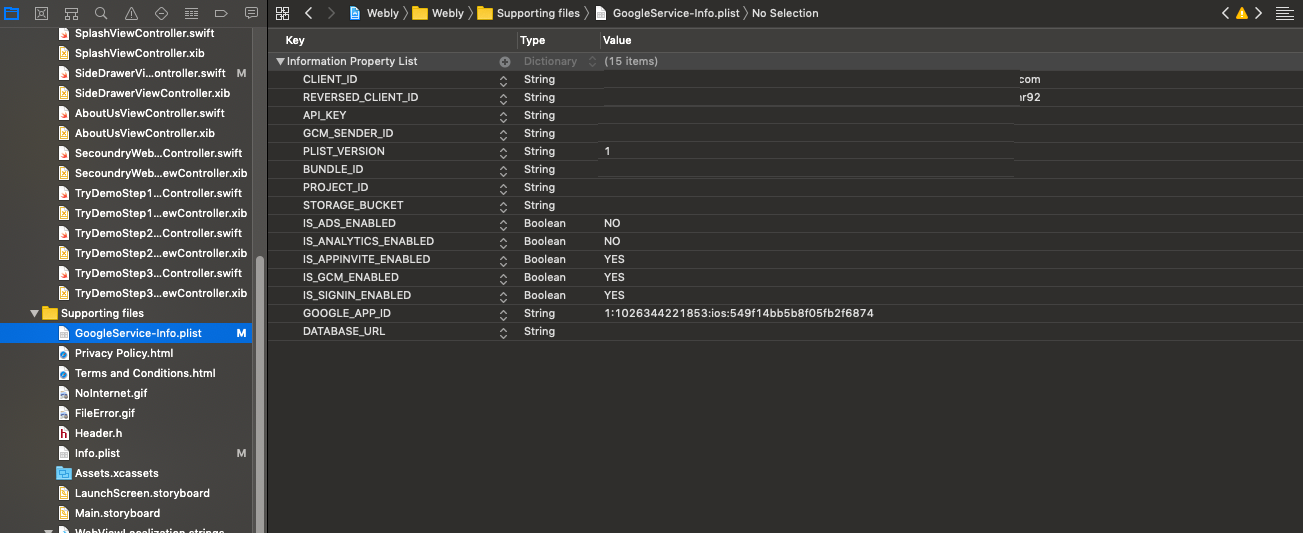
Update your google-services.json file
Push Notification
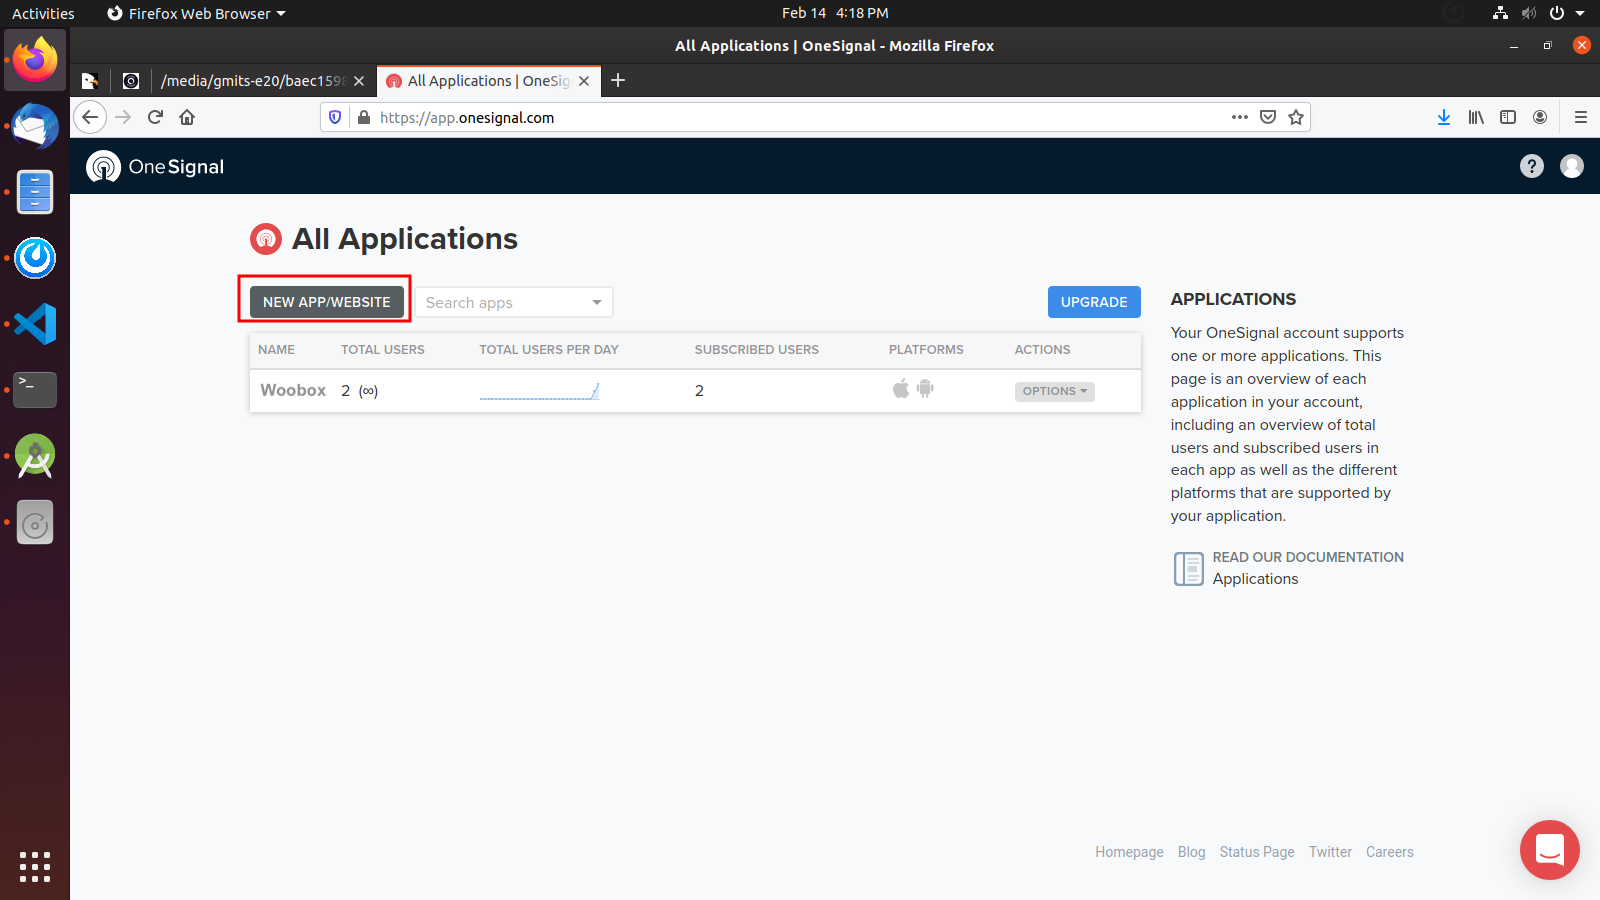
Create New Account on OneSignal
OneSignal is used for send push notification into mobile and web. Fore more details about OneSignal
If you have own OneSignal then login and create project. If you does not have then register your account and create new project.
You create a project with the OneSignal.

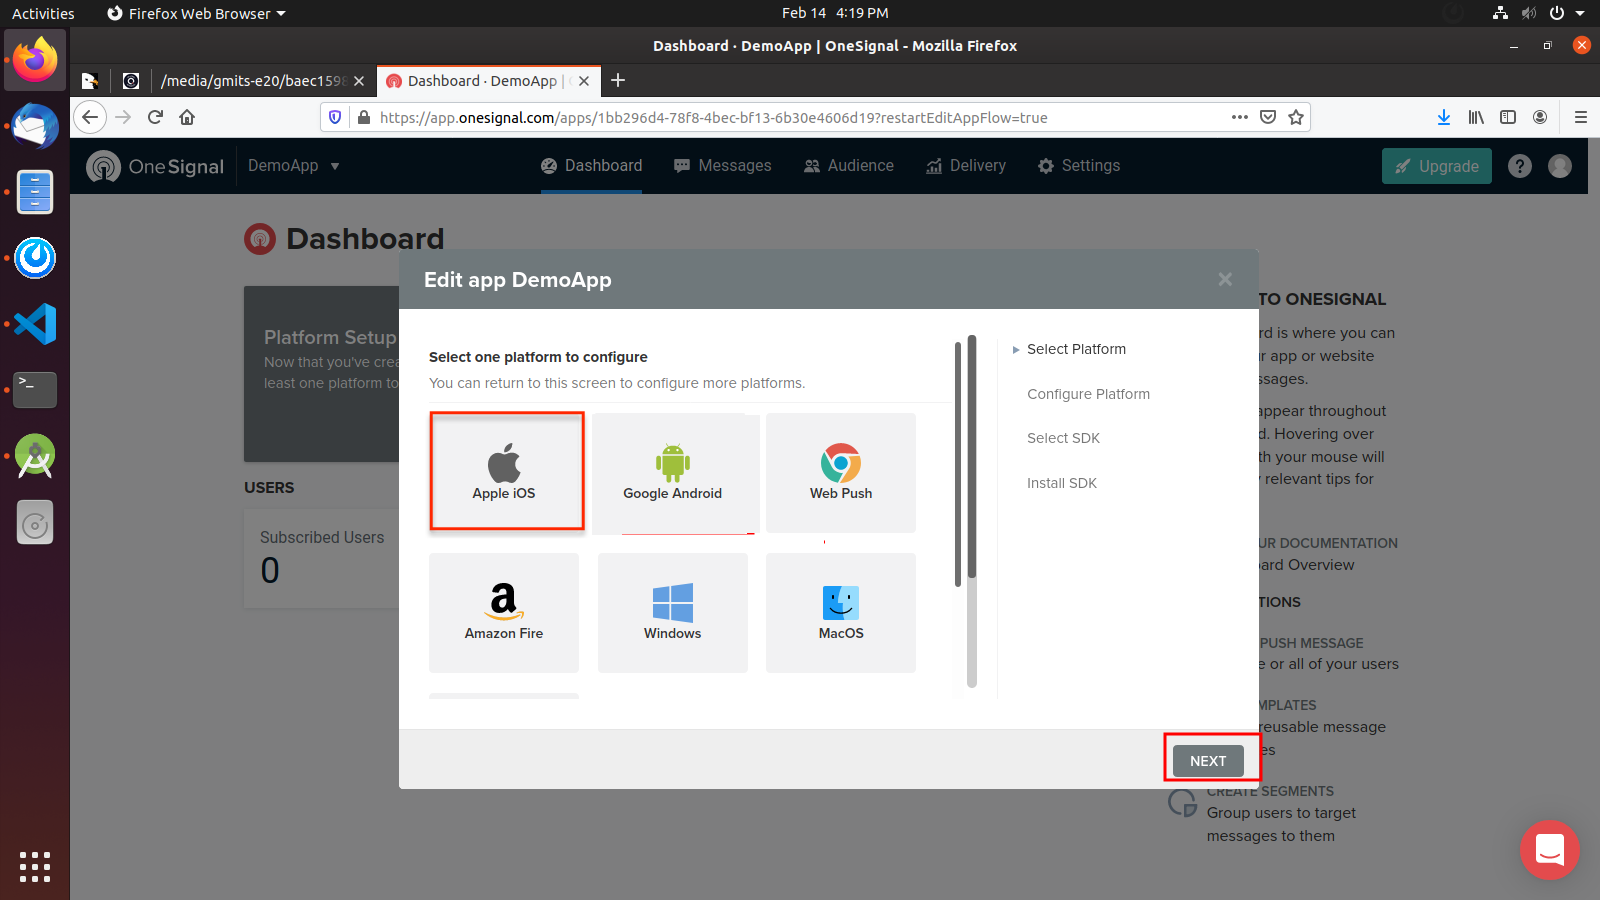
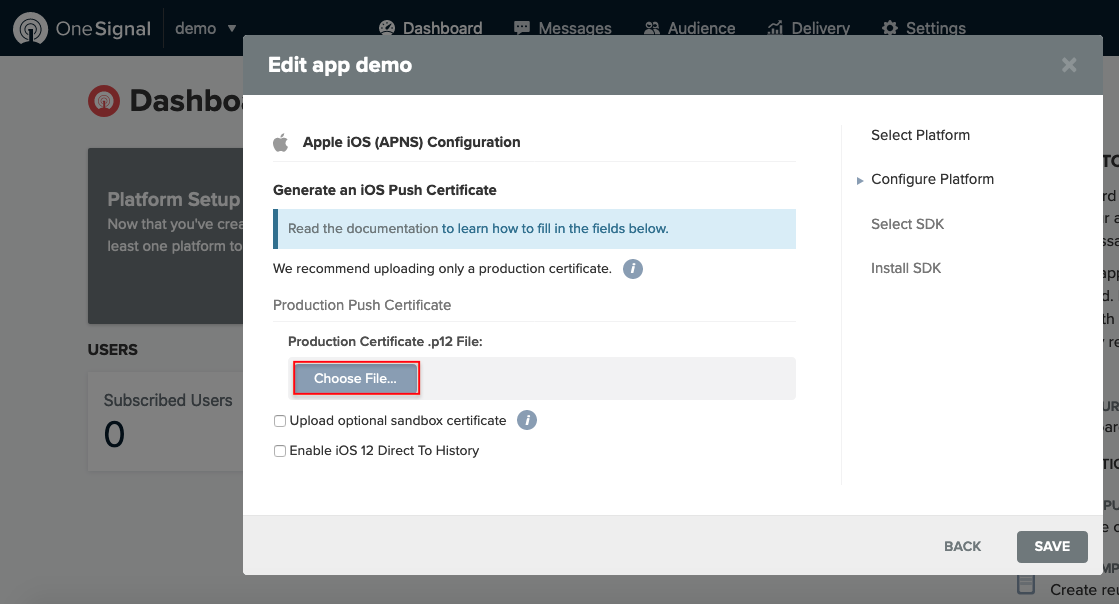
Configure OneSignal on App
We have already added code for sdk and other configuration for onesingal push notification. You have to change your onesignal app id

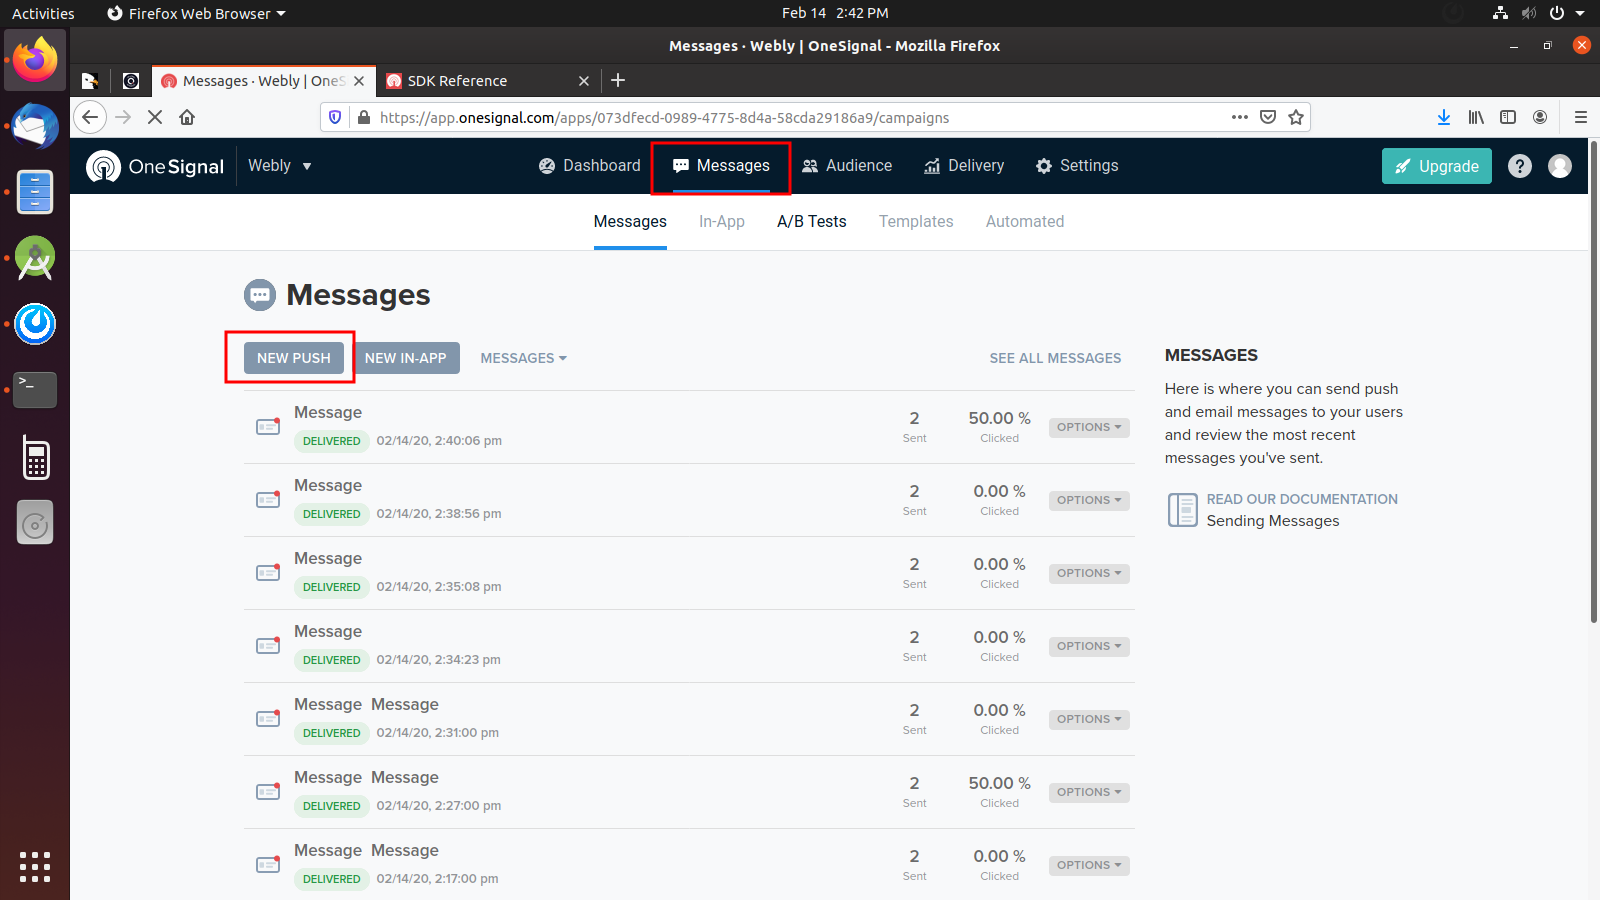
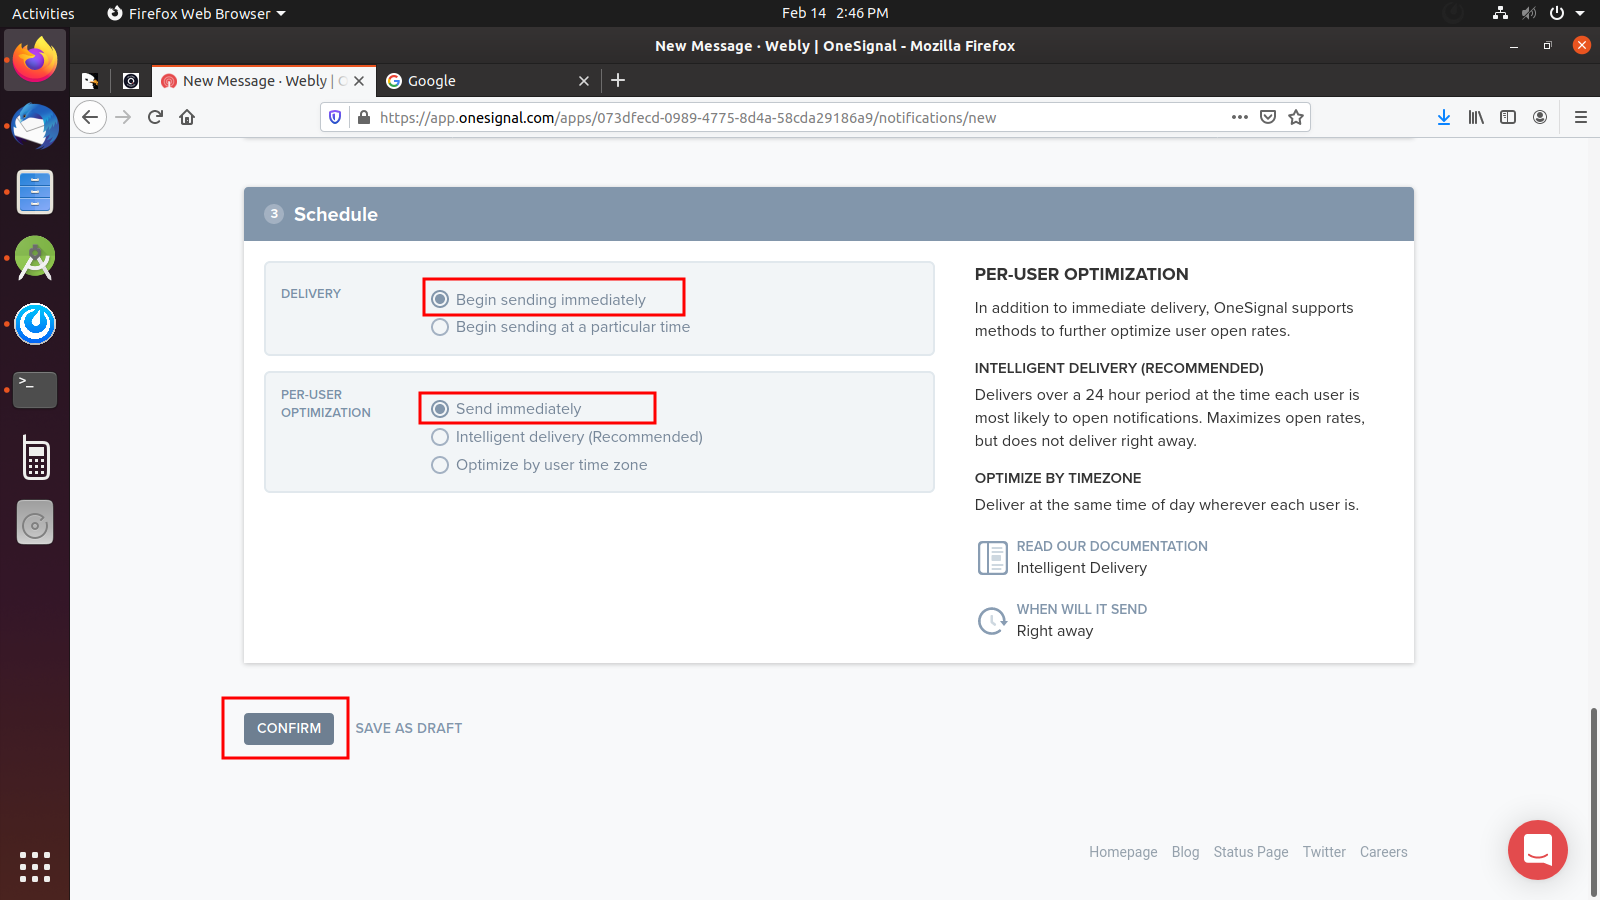
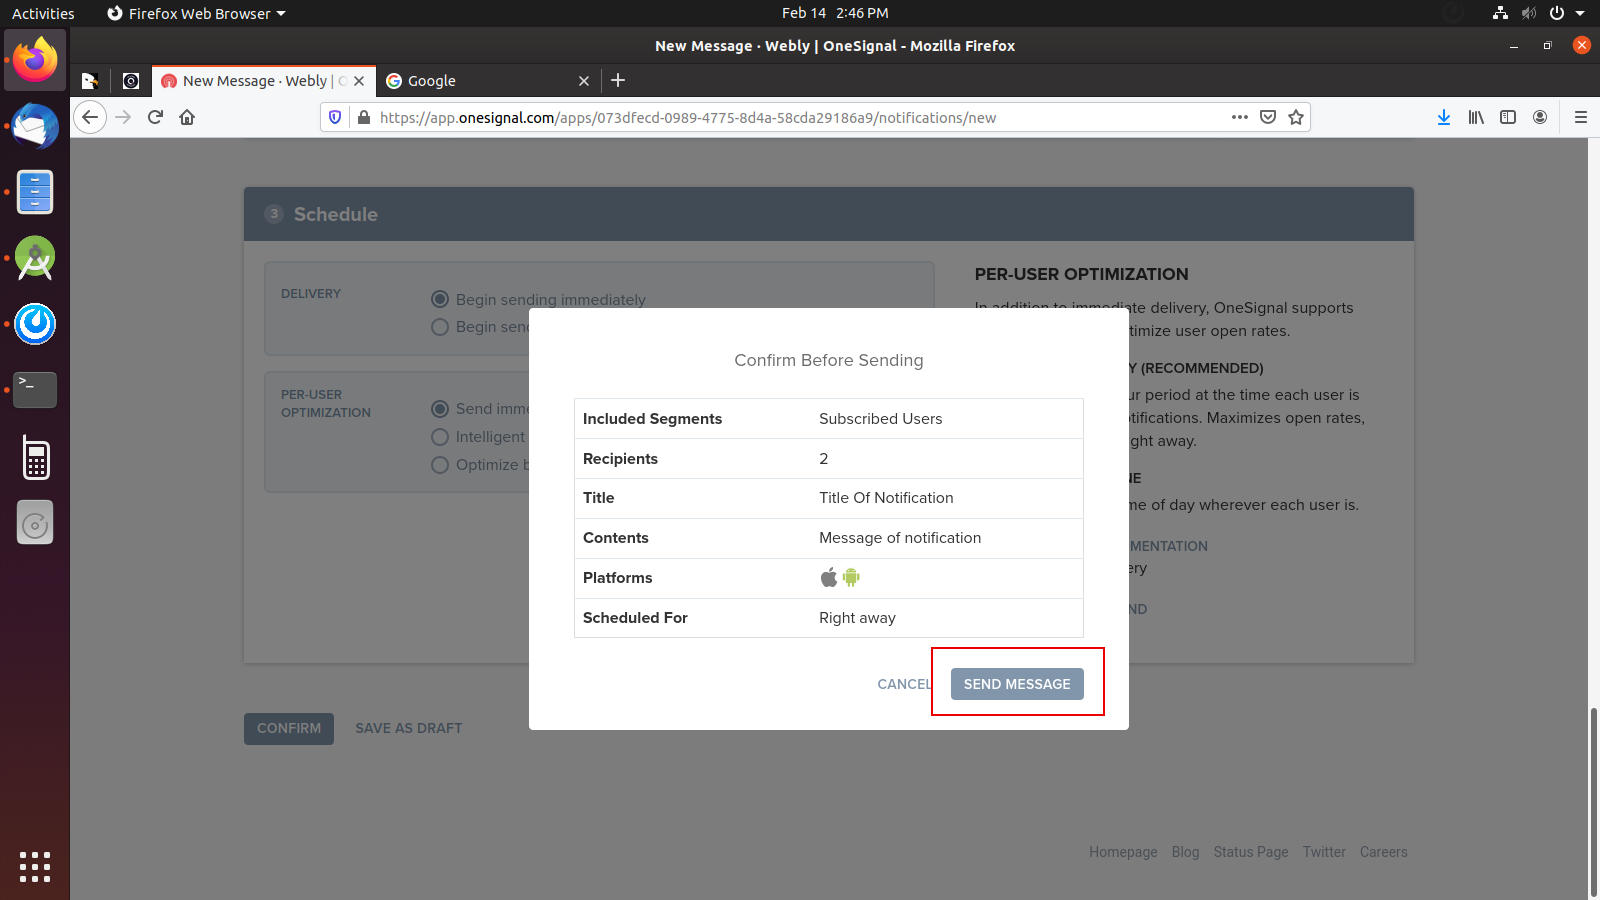
Send Push Notification
To send push notificaiton you need to follow below steps
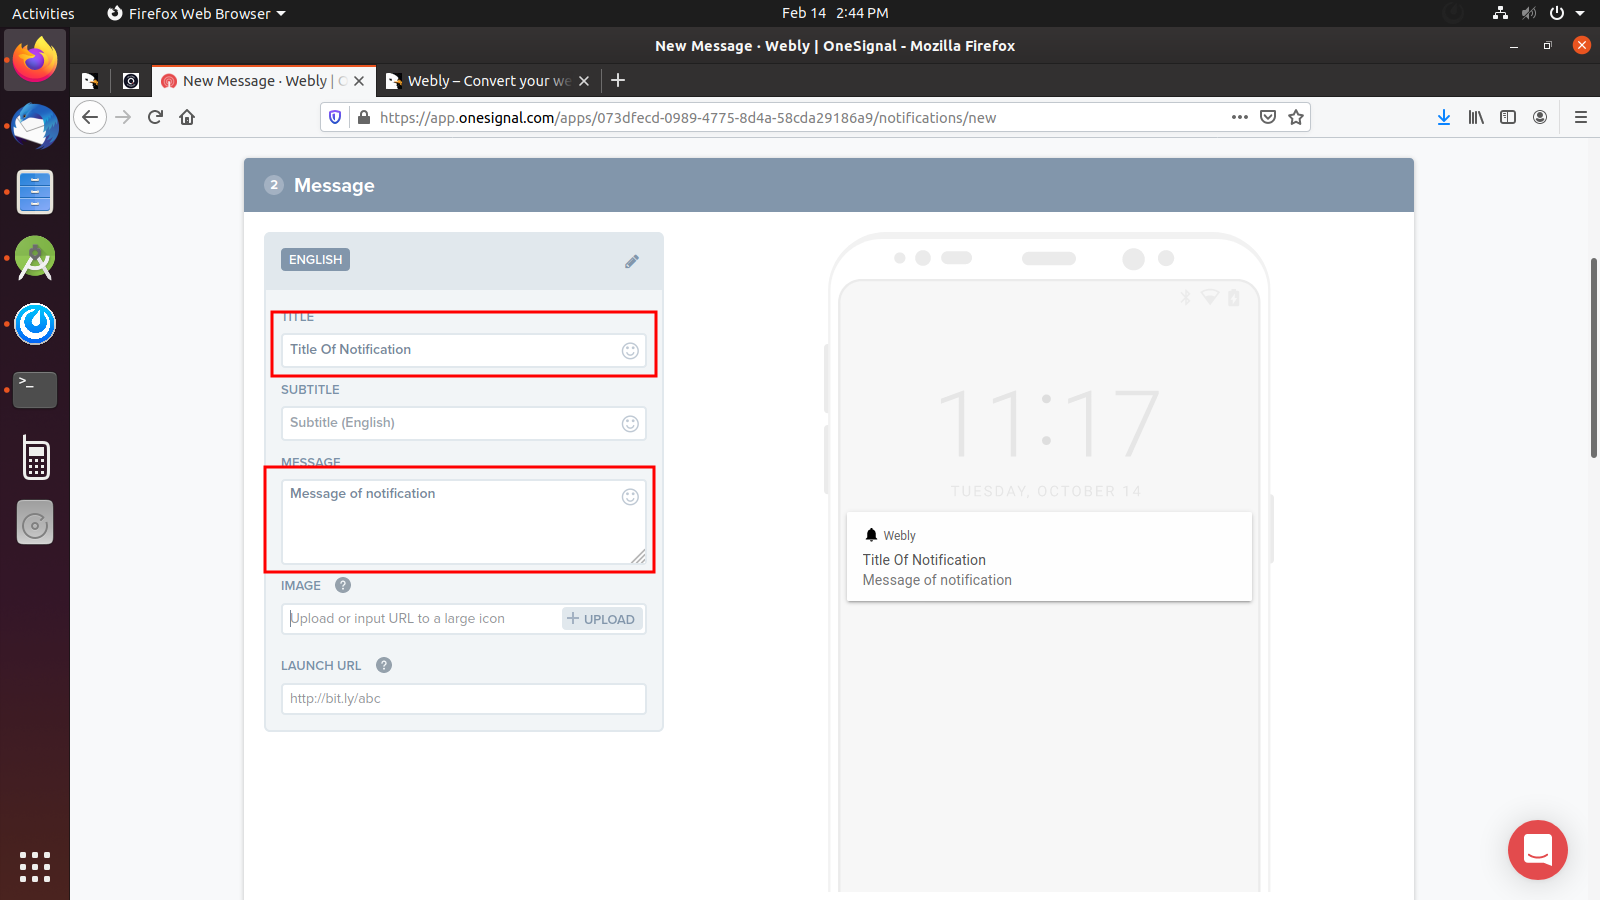
If you want to show image on push notification then select below option with your image url

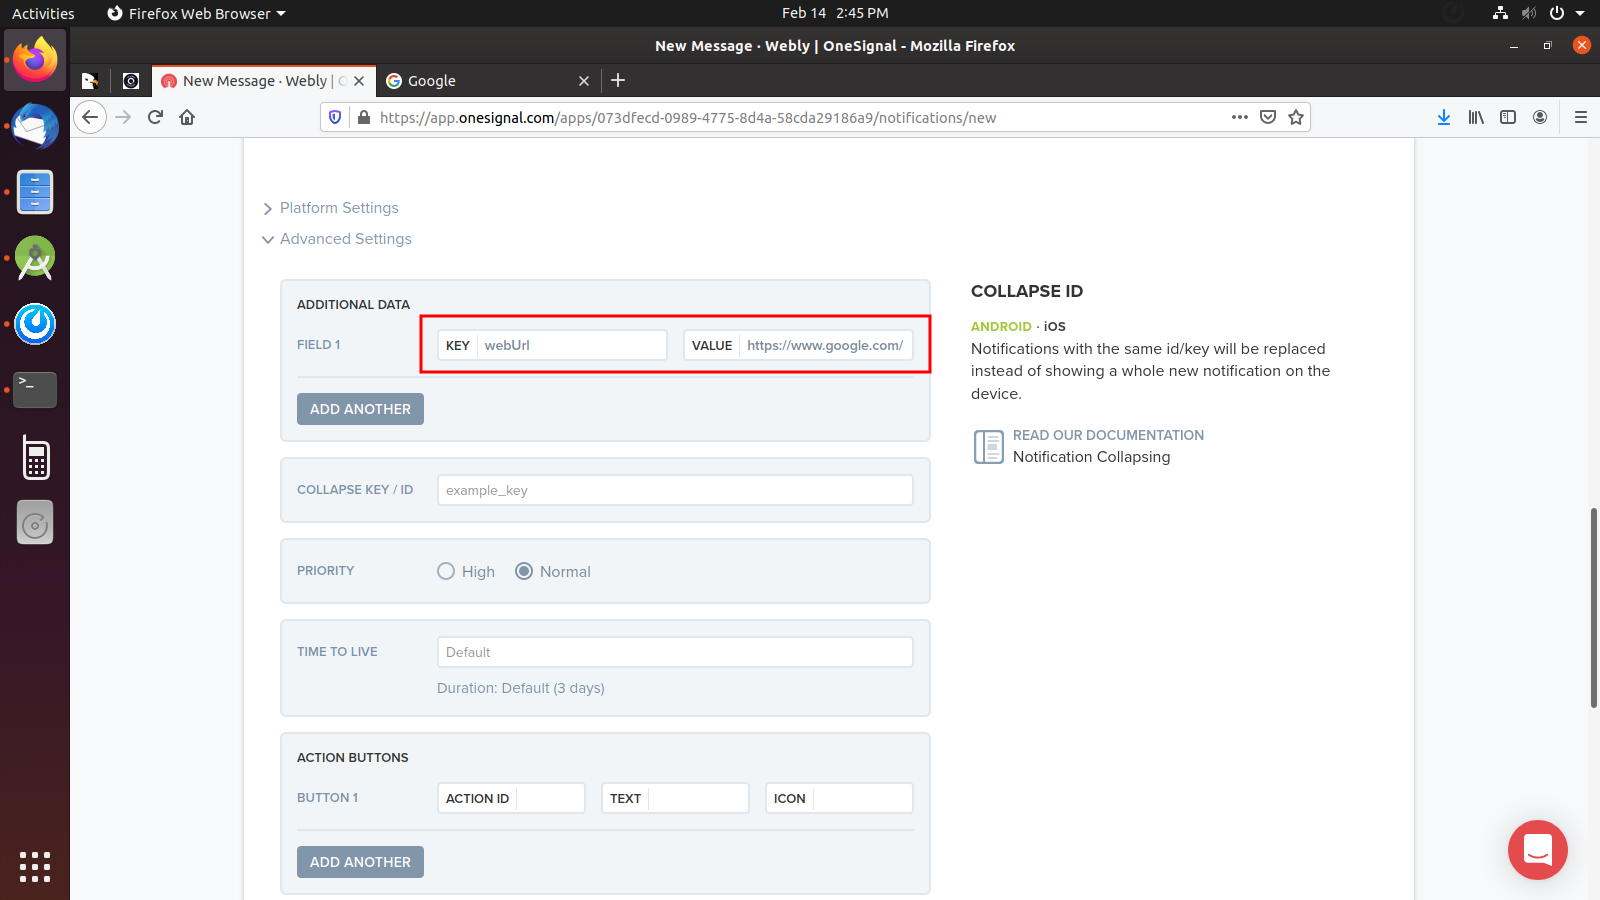
If you want to open some url when user click on notificaiton then select below option with custom key "webUrl"
NOTE: Compulsory Key is "webUrl"
Support & Assistance
Faced a problem? Need assistance with the product? No worries – our customer support team is always ready to help you.
- Support requests are being processed on business days from 9:00 to 18:00 (GMT +05.30) [generally] within 24h to 48h in the order they were received.
- We suggest, while our team reviews your support request, please read the documentation that comes in the zip file of Codecanyon. You can download it from ThemeForest: https://codecanyon.net/downloads
- We are in GMT+5:30 timezone. We address all the support queries 6 days weekly (Sunday off).
- If any support ticket has no response from the item owner for 7 days, the ticket will be considered closed. If you need further assistance you can create another ticket or drop us an email asking to re-open the ticket for you.
- Have pre-sales questions or concerns, please write to us via our website contact page
- If you like our product and support then please drop a rate and write a review at: https://codecanyon.net/downloads
Note:We have launched our support portal on Desky. Please raise a ticket here at https://iqonic.desky.support
Refund Policy
- We don't offer a refund. (If the item is downloaded)
- Please read the description and compatibility content thoroughly before purchasing as we don't offer a refund if you buy it by mistake.
Greetings from Iqonic Design
We are actively looking forward to your feedback in order to make our product more efficient for you. Thanks again!